Vertical Pinball Machine
Parts:
- Windows 10
- Pinball FX3 (Steam)
- 34” QHD Ultra Wide 1440p Monitor (Samsung LS34J550WQUXEN)
- 7”Screen Display 1024*600 LCD Monitor
- Radeon RX590
- Dell Optiplex 3020 (8GB RAM, 3.2GHz i5-4570
- Inductive Plunger (allows trick shots)
- 2x45W Stereo, 68W Subwoofer
- Oak case
Architecture
The vertical Pinball machine was build on a Windows 10, Optiplex 3020 (i5) with 8GB RAM and a 16GB Radeon RX 590 (8 GB GDDR5).
The Dell Optiplex shows a BIOS error when the front cover is not connected (and I threw it away before realizing I should have kept the cable). So I added an additional Arduino that emulates a keyboard and sends an “F2” keystroke 5 seconds after power-up.
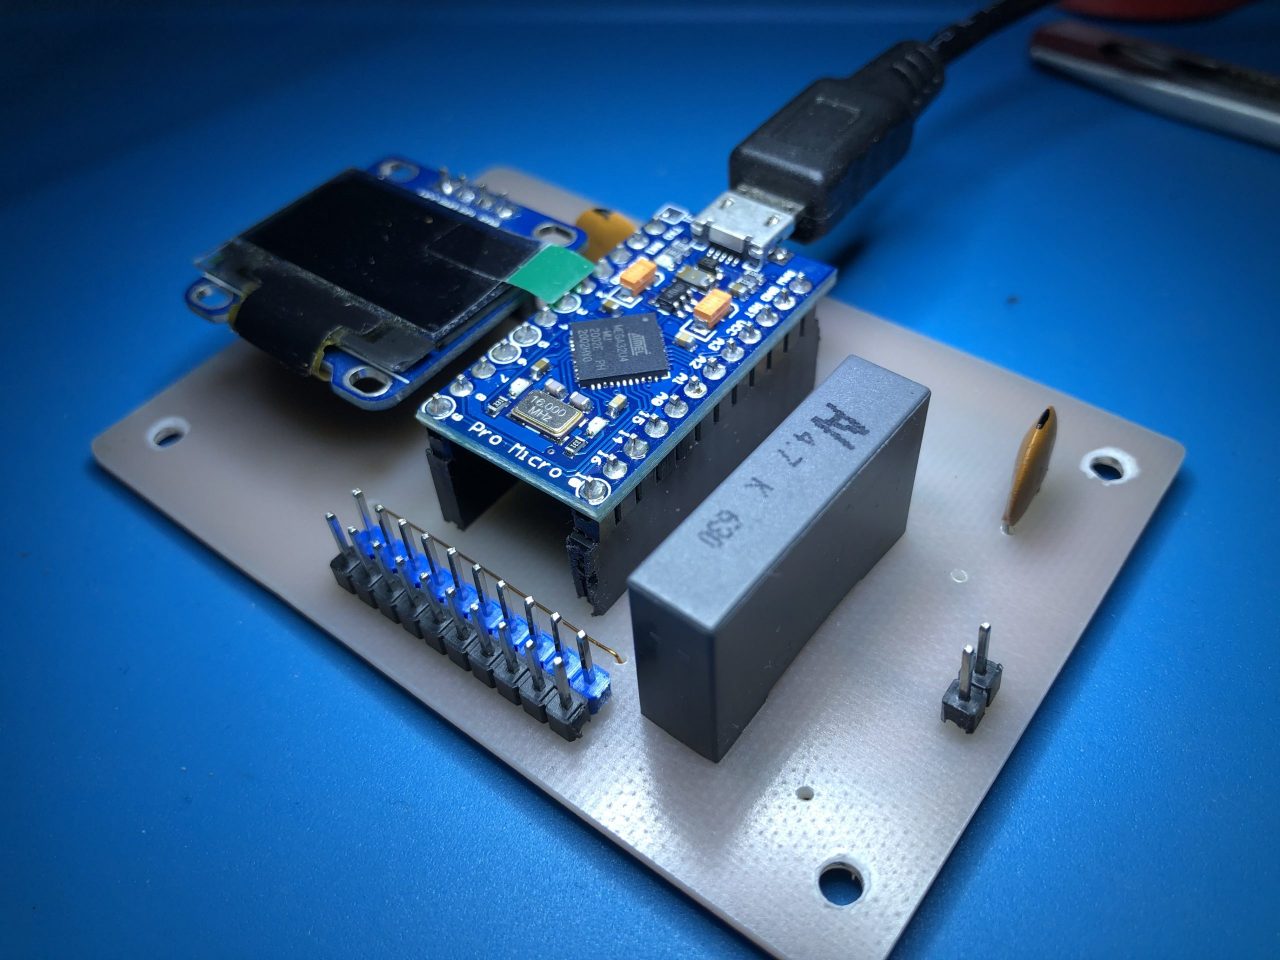
I am particular proud of the inductive plunger, which allows skill shots without use of a linear potentiometer (no wear!). You can Google “Arduino Inductance LM339” and will find good description of how to do it. Schematics and board can be found in the resource section.
One problem remains unsolved: I need an external keyboard to shutdown windows. I did not want to mess with any software that maps keystrokes, so at the end of the gaming night, I pull out a little wireless keyboard and shutdown Windows. No enough of an inconvenience to warrant drilling another hole in the cabinet.
Cabinet
I ordered a kitchen worktop (2m x 0.9m x 2cm), cut it into 12cm wide boards of 2cm thicknes and various lengths, halved the thickness to about 8mm (thereby doubling the number of boards), glued the boards together to form 8mm thick sheets and cut the sides of the cabinet. Easy.
Could have ordered oak boards right away.
<LINK TO CABINET>
For the subwoofer and speaker cut-outs I used a laminate cutter (also known as a hand router), with a ball bearing at the tip. I printed jigs with my 3D printer that I screwed to the bottom of the board to guide the router.
This produced super neat and perfectly round cutouts.
I used a biscuit jointer when making the large boards. That was a stupid idea because you need to know where you make the cuts and ensure there’s no biscuit where you cut the board: it looks ugly when the biscuit shines through at an edge, like the diagonal cut that I had to make for the front of the cabinet.
Windows PC
The Dell Optiplex 3020 was gutted and basically only the mainboard survived, mounted on an open frame at a 20 degree angle. The Dell PSU was replaced with a Corsair VX550 (the Optiplex mainboard requires a PSU adapter cable which can be ordered from Amazon for £10. A cheap 256GB SSD stores the data.
Beware that the Dell motherboard will report an error and not booting unless the frontpanel is attached. I learned the hard way AFTER I had thrown away the Dell case and NOT retained the front panel or cable. So I programmed an Arduino to simulate an “F2” keypress shortly after boot to get past the error message.
The mainboard is mounted at an angle on a simple frame.
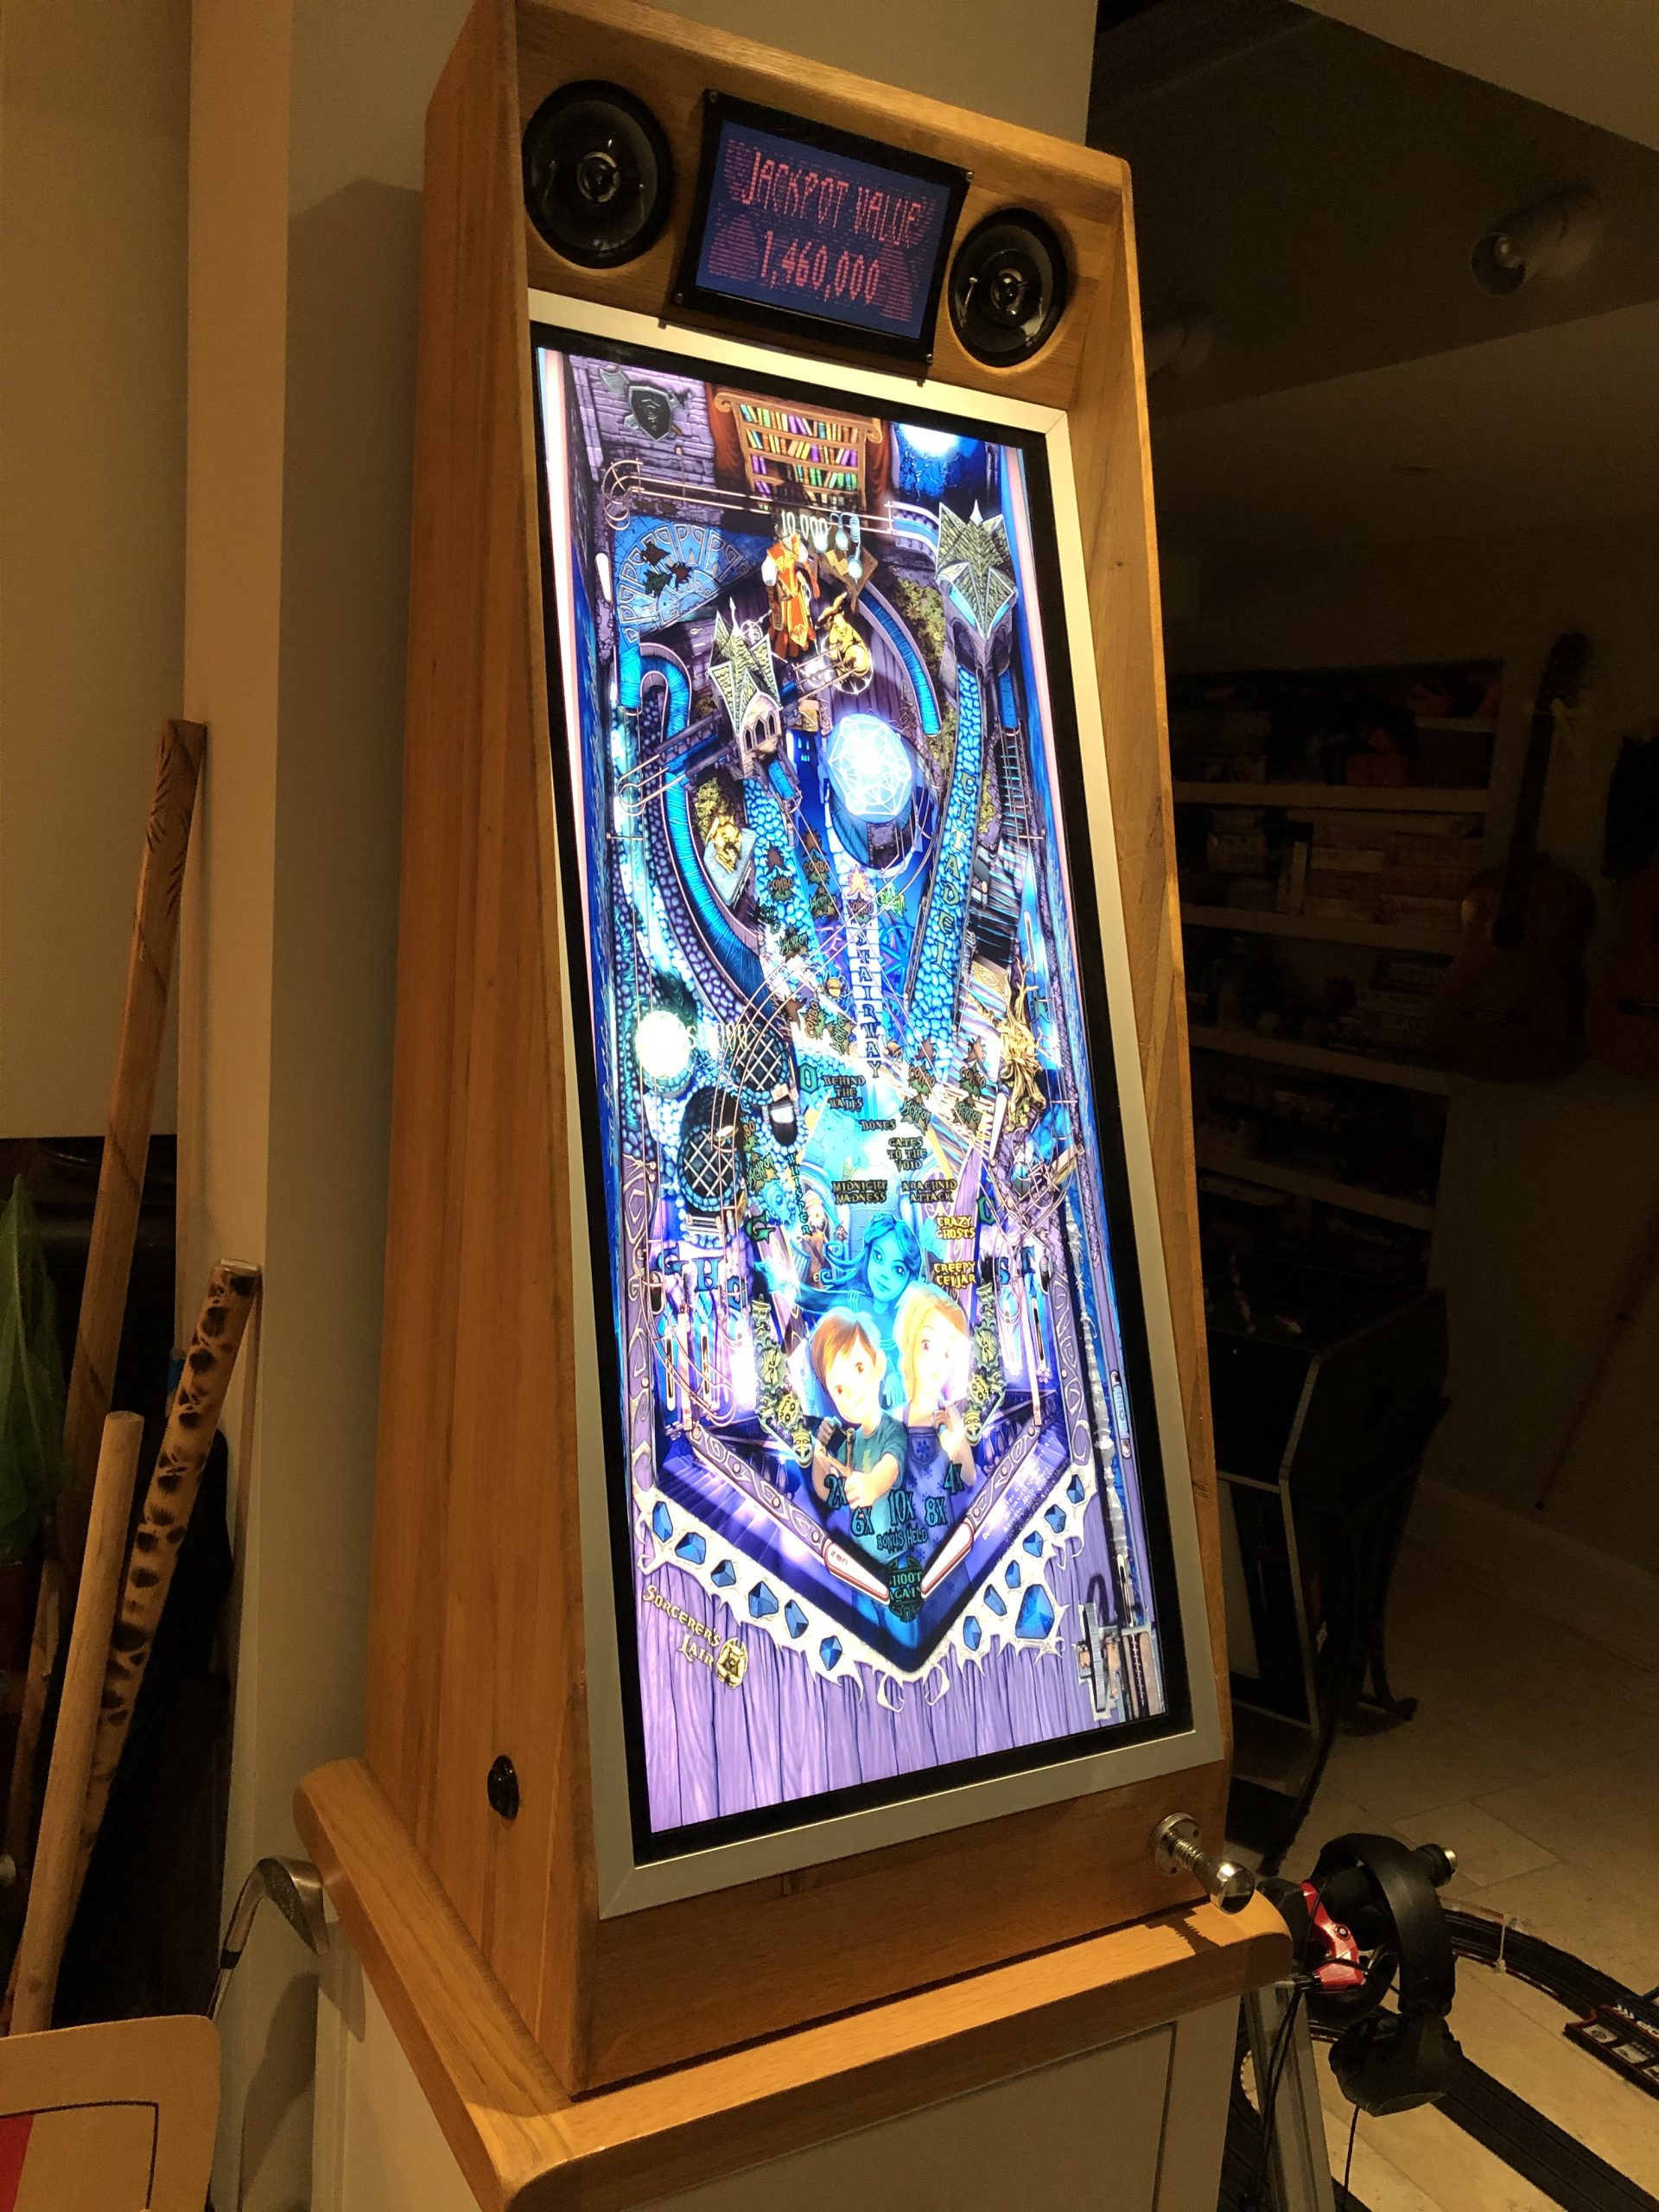
Screens
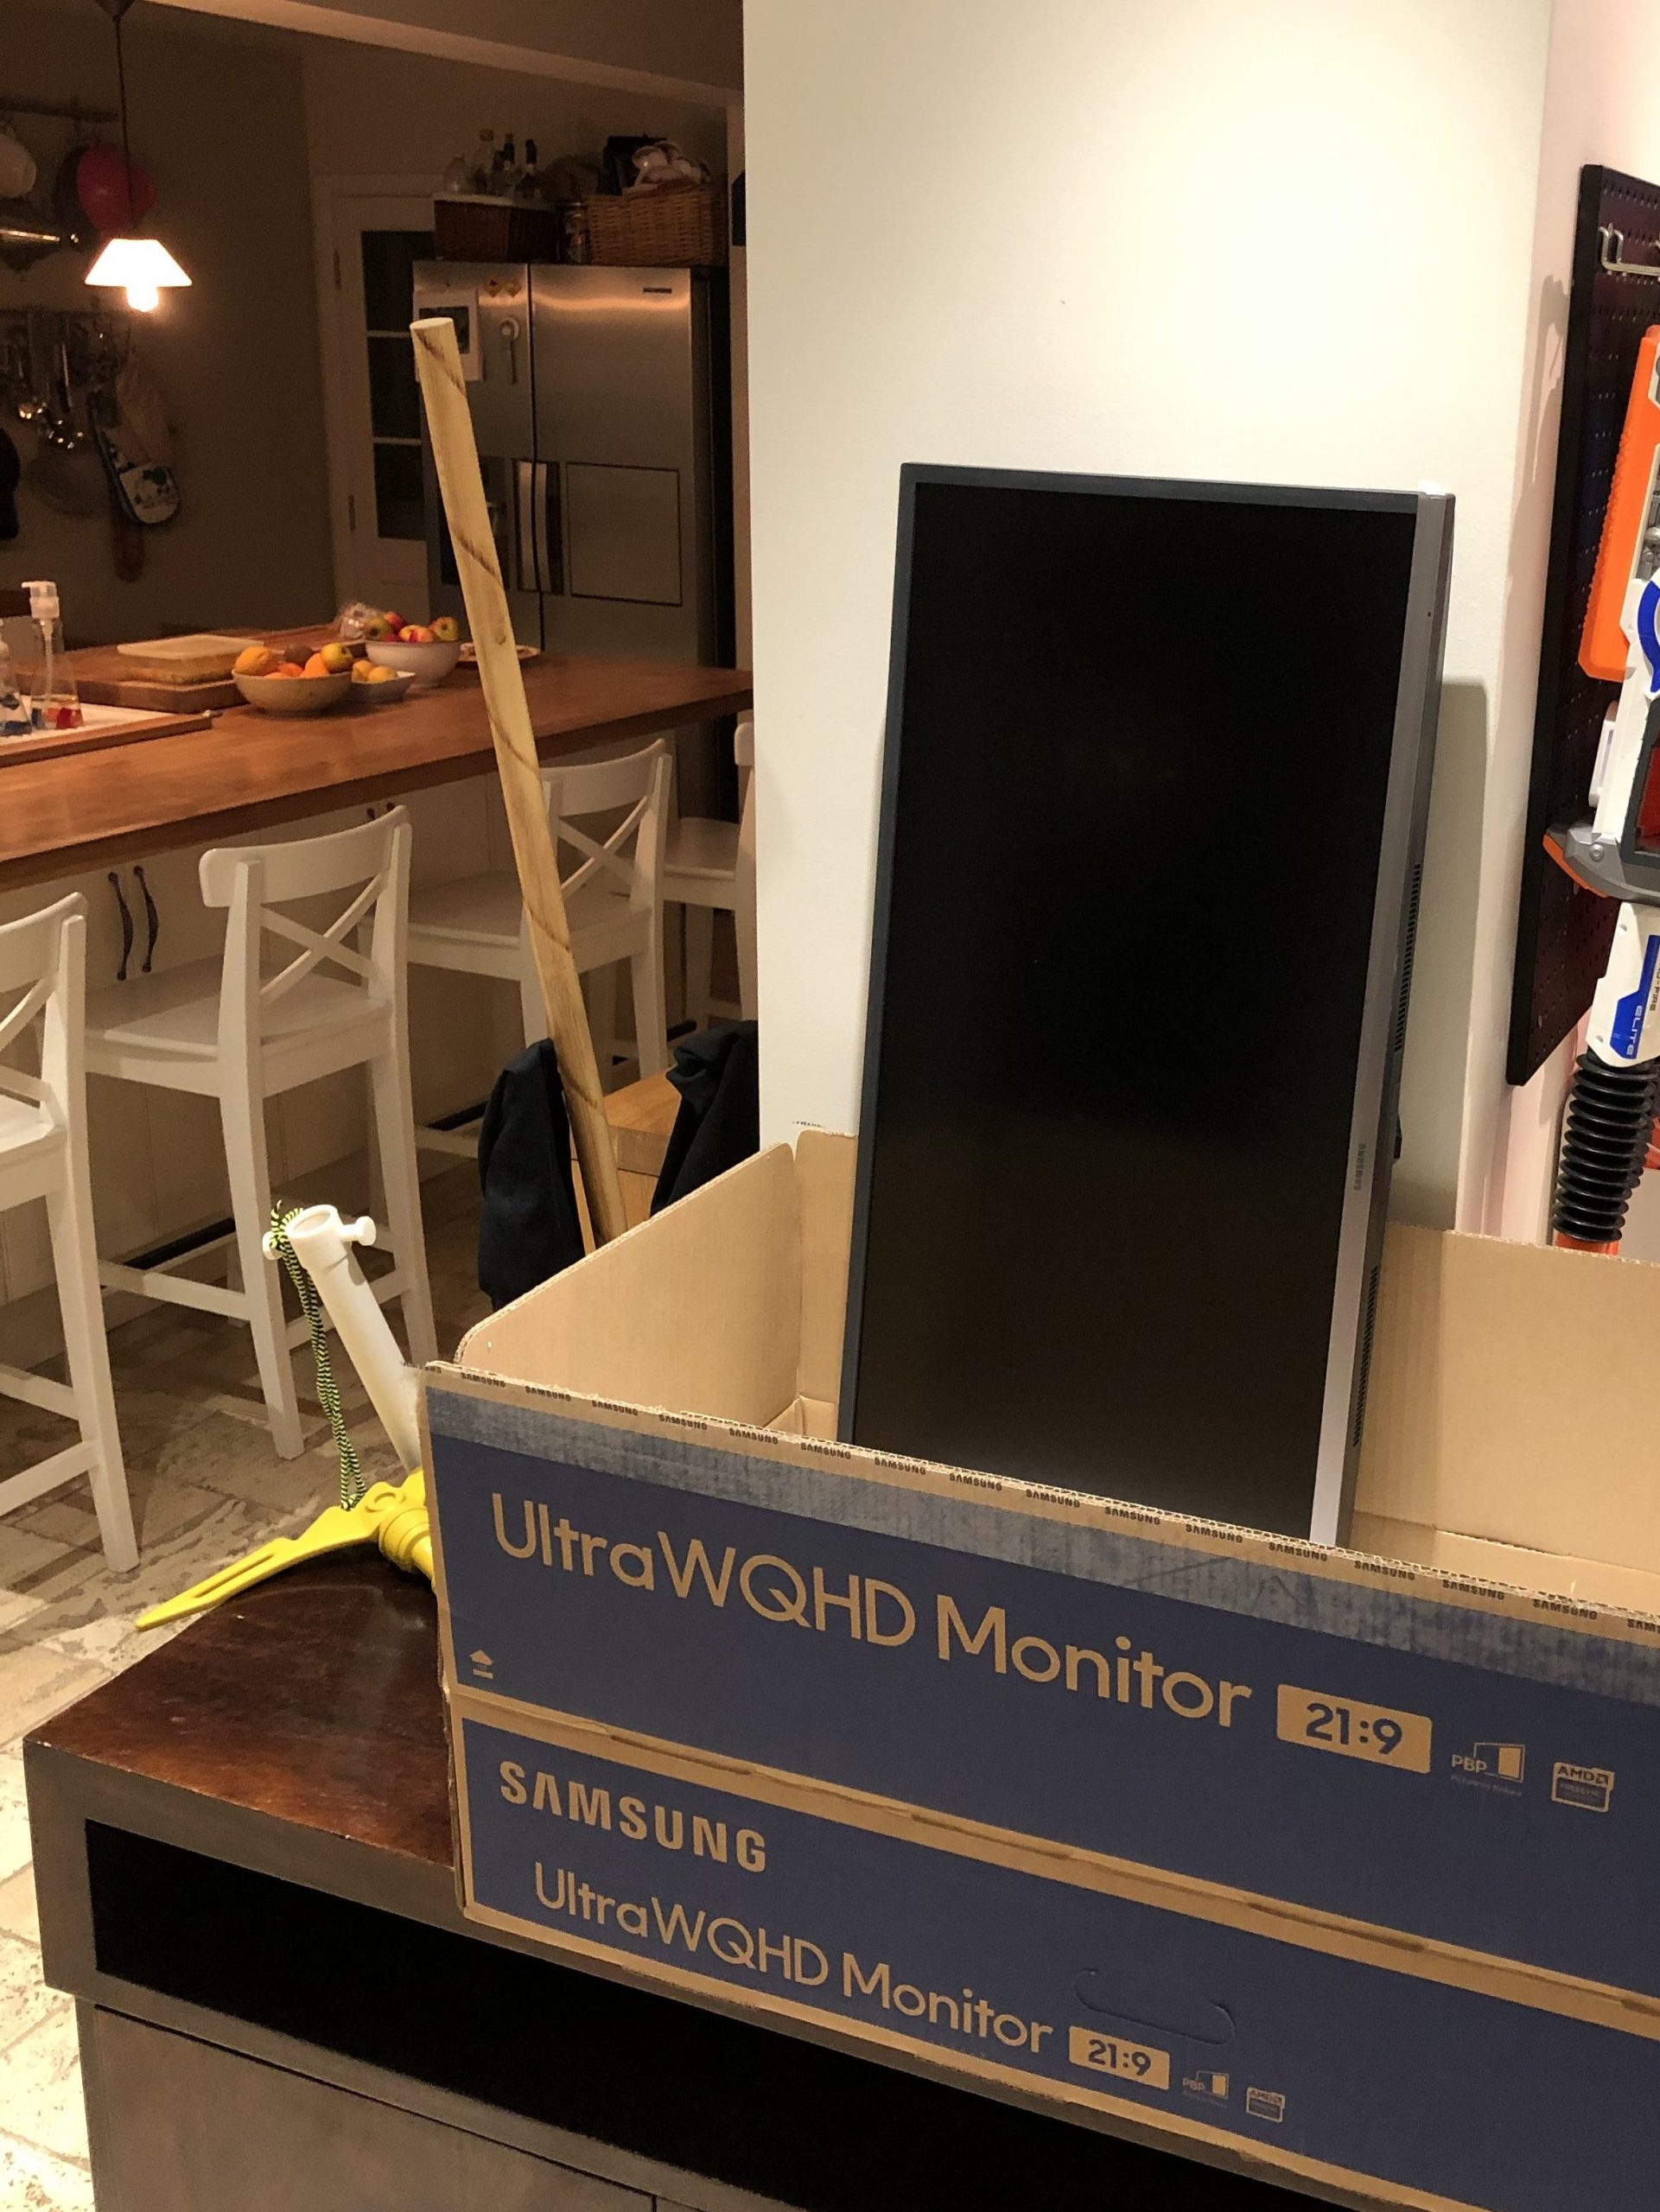
A Samsung LS34J550WQUXEN 34″ Ultra Wide LED Monitor (WQHD 3440×1440, Freesync, 2 x HDMI, DisplayPort) was dissected (use a credit card to buy it and then later to pry the case open. Comes apart very neatly.
I build a pine frame that the monitor rests on, with an 5mm tempered glass pane on top. Black spray paint from the back creates a nice bezel that covers the edge of the display and the wooden frame. Everything is held in place by 20x30mm aluminium profiles (I screwed up and cut one side 1mm too short, so had to patch it. not my proudest moment, but I ran out of profile and then lockdown hit and I couldn’t get to the hardware store).
The small top screen is a super cheap AliExpress 1024×600 screen. A small OLED display would have been better I suspect, because I went a bit too cheap on the smalls screen and as a result it’s not quite as bright as I would have liked it to be.
Buttons and Plunger/Inductance Meter
Figuring out how to measure the position of the plunger with a coil took the longest. Usually you either trigger a switch or pull a linear potentiometer back and forth. The latter allows trick shots.
I did not like the idea to attach a potentiometer to the plunger and having to deal with the mechanical hassle, potentially incurring problems after hours of use (the plunger is difficult to reach and not easily removable.
The idea was to wind a coil around the plunger and as the plunger retracts, it pulls out of the coil which should change the magnetic flow and the inductance of the coil.
There are great guides out there that describe how to use an Arduino to measure inductance. So I thought how hard can it be?
The circuit works as follows:
- The Arduino triggers a pulse that “rings the bell”. The bell in this case is the coil and a capacitor.
- Coil and capacitor form an LC oscillator. The frequency depends on the capacitance and the inductance. If you keep the capacitor (1uF) fixed, then the change in frequency is an indication for the change in inductance, which in turn is an indication of how far the plunger is pulled out of the coil.
Mujahid has written a nice piece about it here: https://www.instructables.com/Inductance-Meter-Using-Arduino/
- Using an LM339 helps converting the analog signal into a TTL signal that the Arduino can measure. The length of a pulse is a measure for the position of the plunger.
See it in action here:
Schematic:
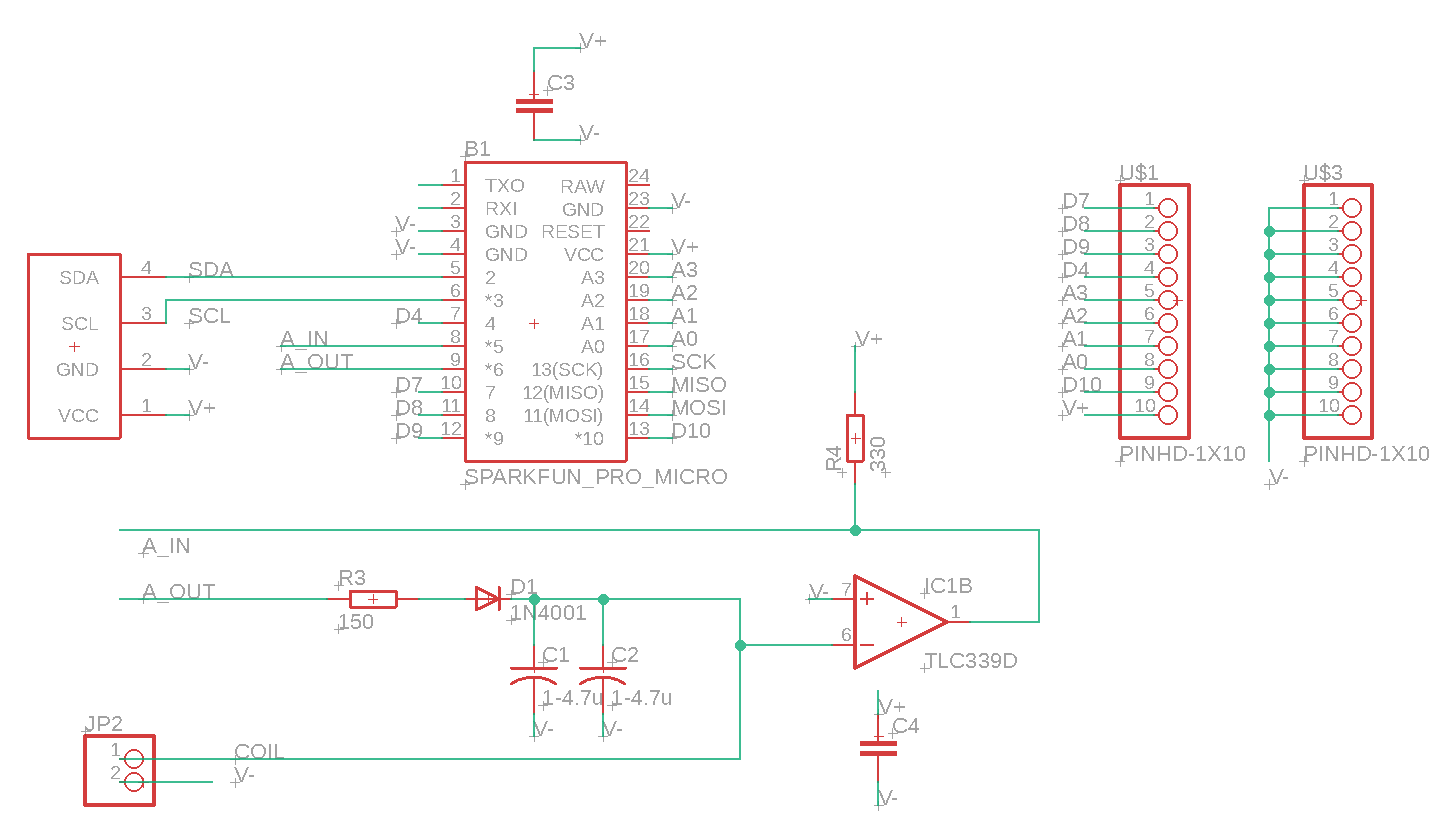
- The Arduino simulates a joystick and sends the position of the plunger as z-axis values to the PC. It also takes care of the buttons that control the flippers, the gamepad, Select, Start and Back. The Atmega 32U4 has a build-in USB controller (you cannot use an Arduino Uno because it relies on an external USB-Serial controller).
Was it worth it?
Was it worth it? Many people on the Internet will tell you that virtual pinball machines are inferior, but I disagree. While virtual tables can’t match the tactile feedback and nostalgia of a real pinball machine, they should be viewed as a unique category. Is it the same as a “real” pinball machine? Absolutely not—it’s essentially a vertical screen. However, the experience is highly engaging, and the FX3 software is impressively realistic. The reduced space requirements, combined with the flexibility to play any pinball machine I want and the ability to own dozens of different tables in one package, make it worthwhile.
I enjoyed the building process and figuring out how to make the inductive plunger work. Even after about eight months, playing my vertical pinball machine remains fun, and it’s exciting to see new tables being released each month.