The K40 laser cutter is quite a bargain (I paid £350 for mine), but you get what you pay for. The cutter leaves you in many aspects wanting, and all these shortcomings combined will drive you insane, will frustrate you and limit your creative abilities.
Software/Hardware:
- No air assist
- Controller board / software simply sucks, i.e it is unusable, the license key is a pain
- No GCode laser power control
- No SD Card reader
Case:
- No light in the work area
- Unusable workpiece holder
- Exhaust duct is too long, no usable connector at the back of the case, exhaust fan is unusable.
Cooling
- No integrated heat exchanger
- No coolant flow monitoring
- No coolant temperature monitoring
Safety
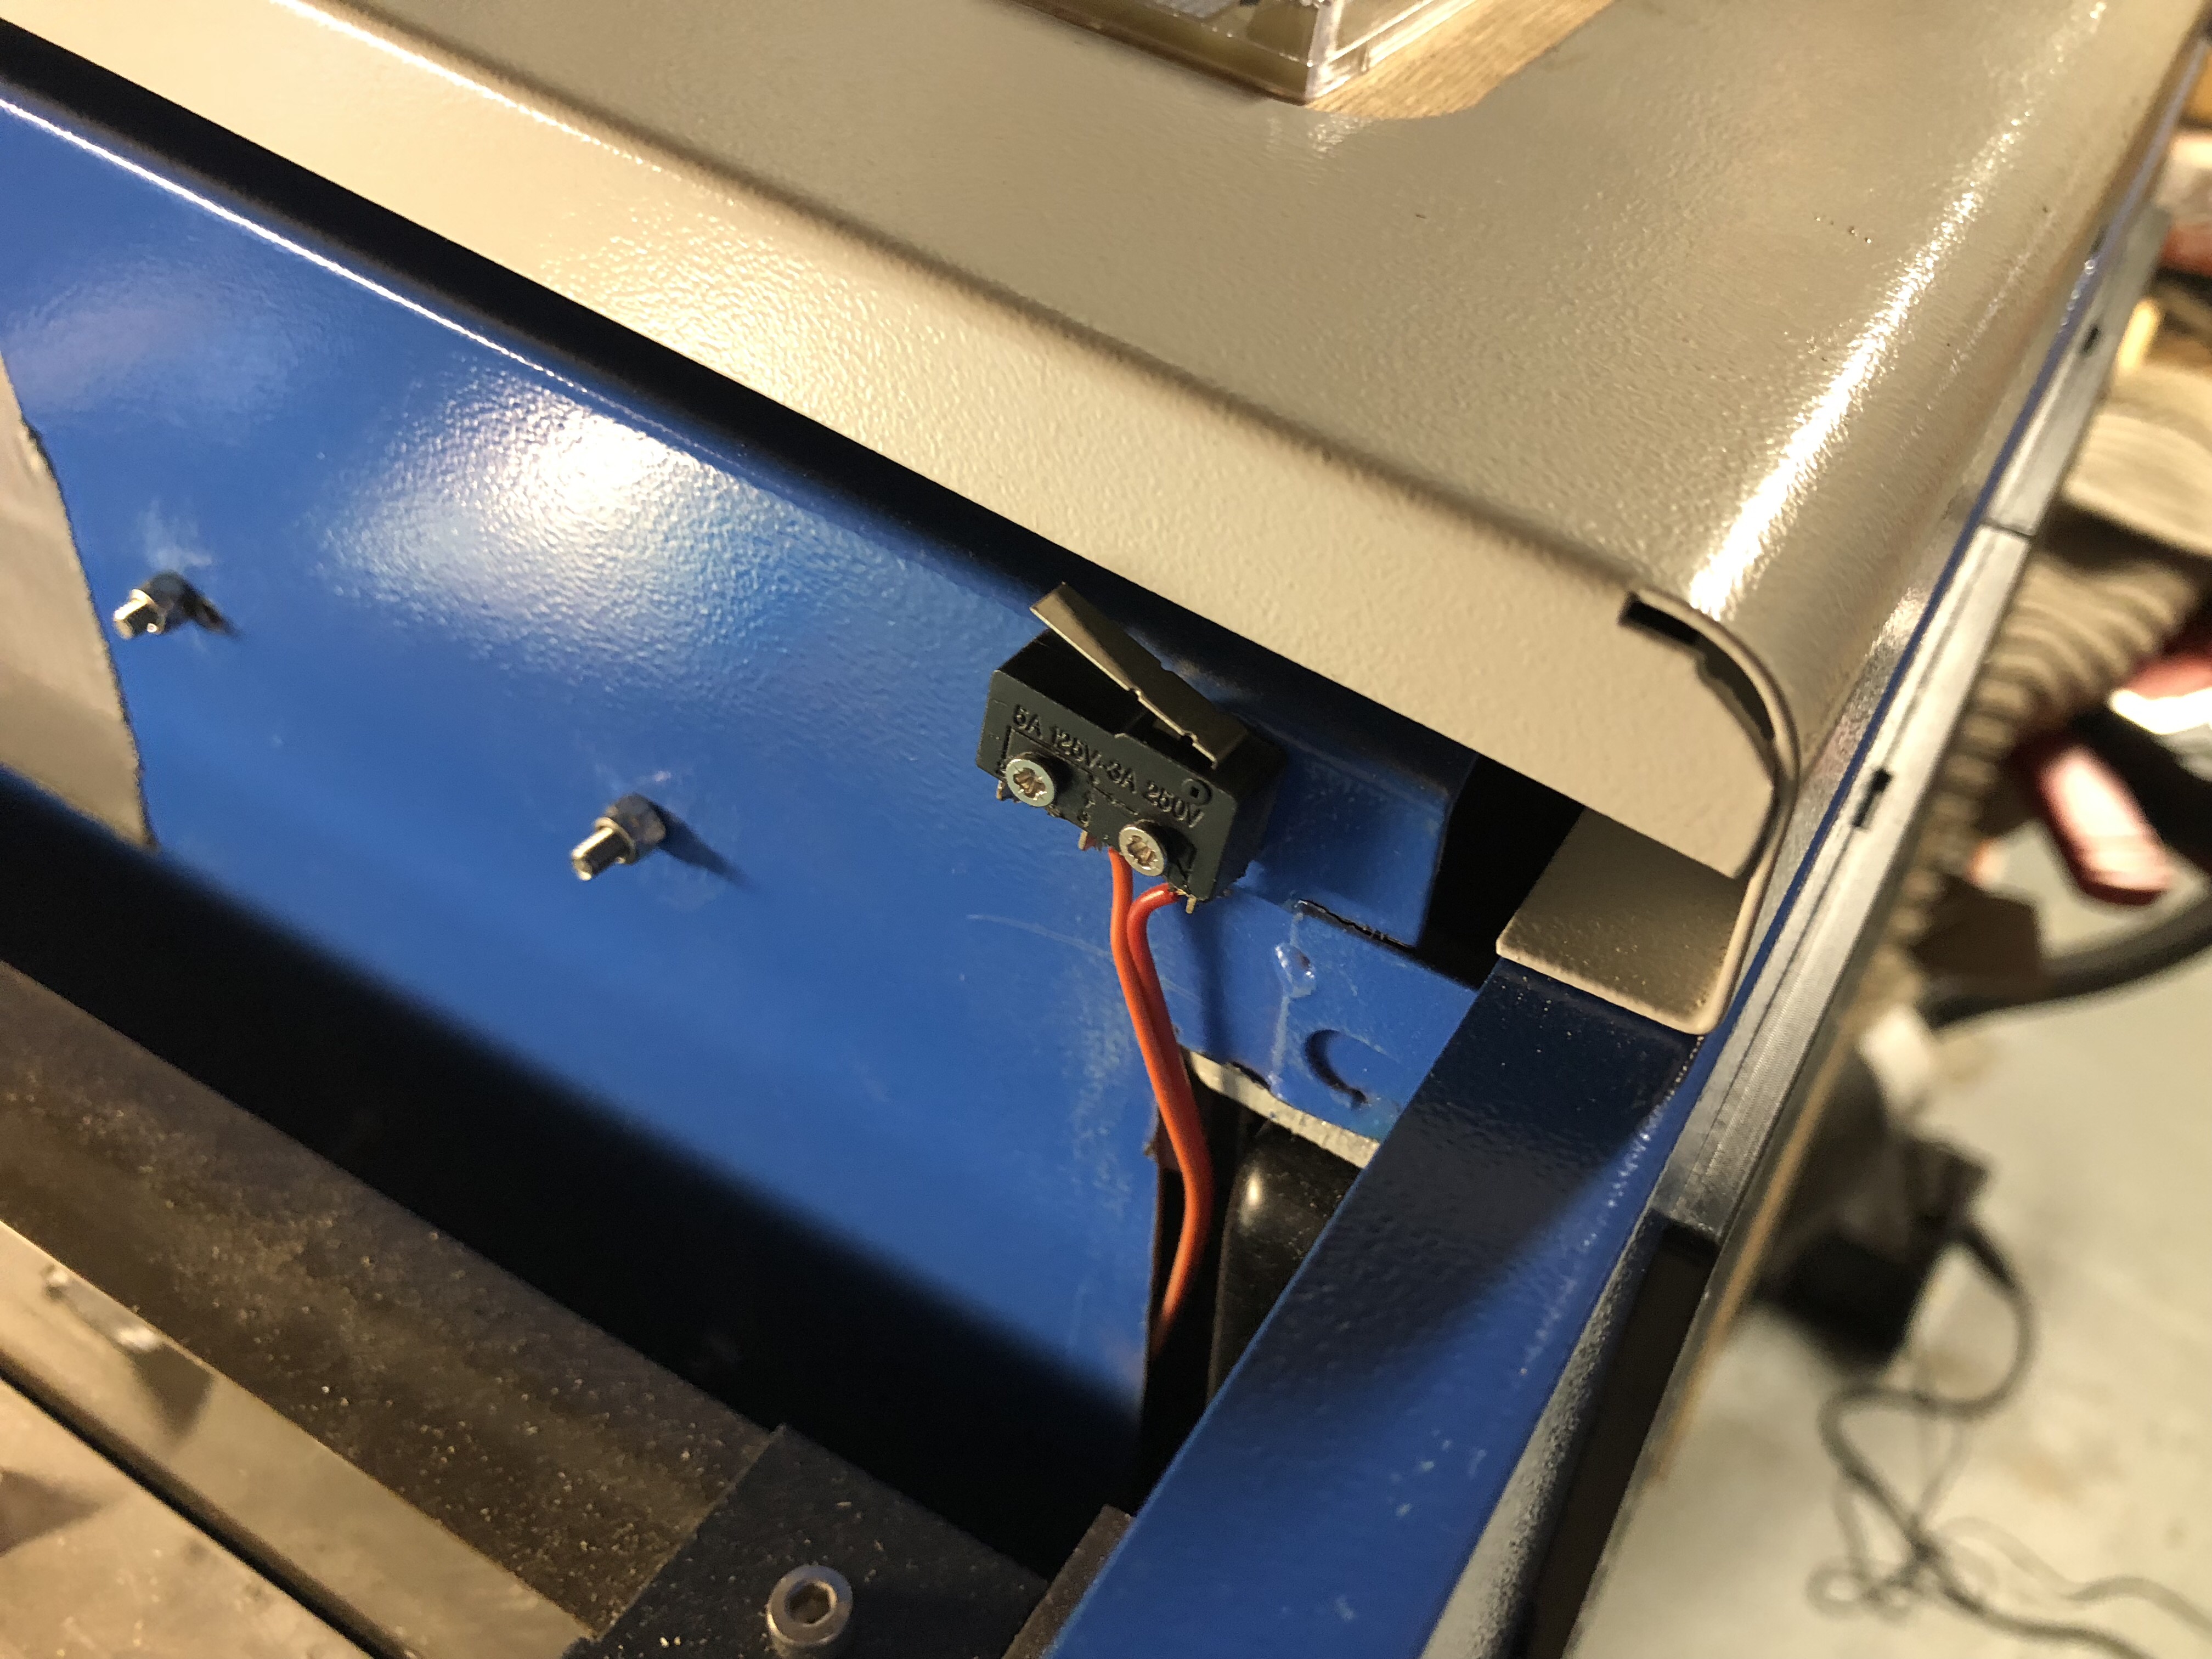
- No emergency laser power-off when you open the work area lid
The good news is that there are solutions available for all these shortcomings:
Software/Hardware:
- Replace controller with Arduino/Ramps HW and Marlin/Turnkey SW
- Add garden pond air compressor and air-assist nozzle
Case
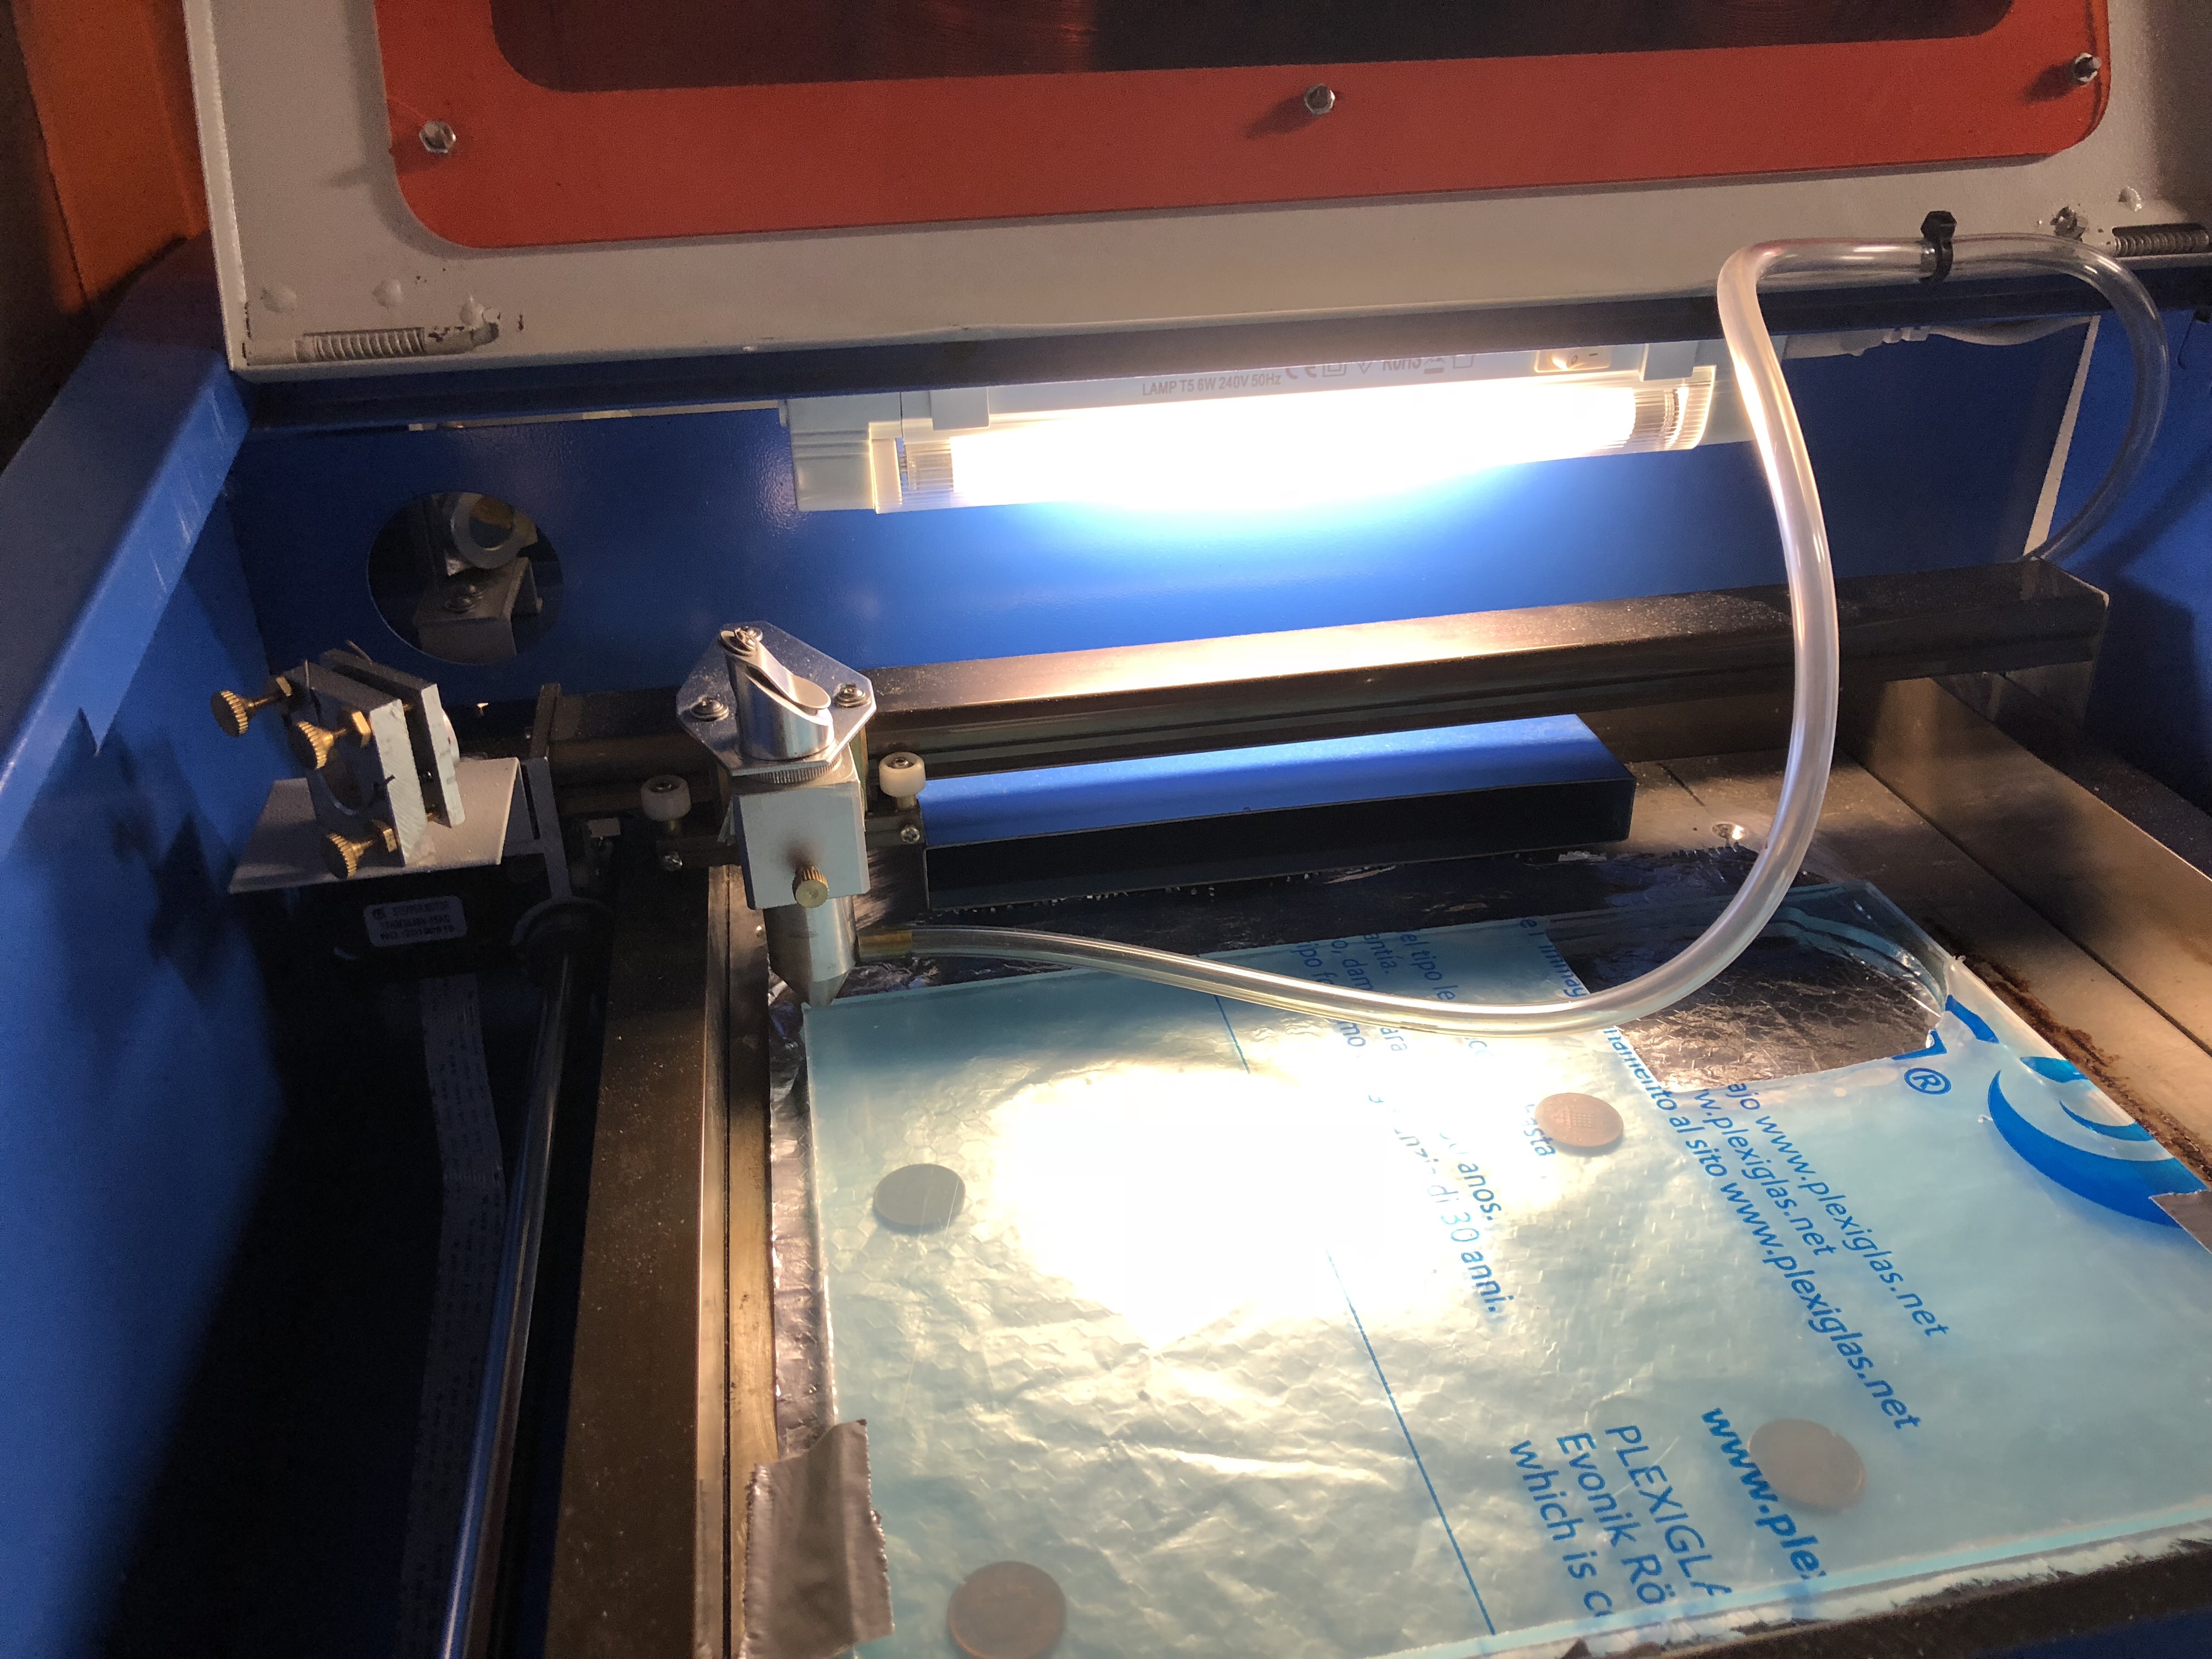
- Add kitchen worktop light
- Replace workpiece holder with aluminium plate
- Shorten the exhaust inside work are, add 10mm exhaust adapter on outside
Cooling / Safety
- Always wear safety glasses, ensure proper air ventilation, keep a fire extinguisher around
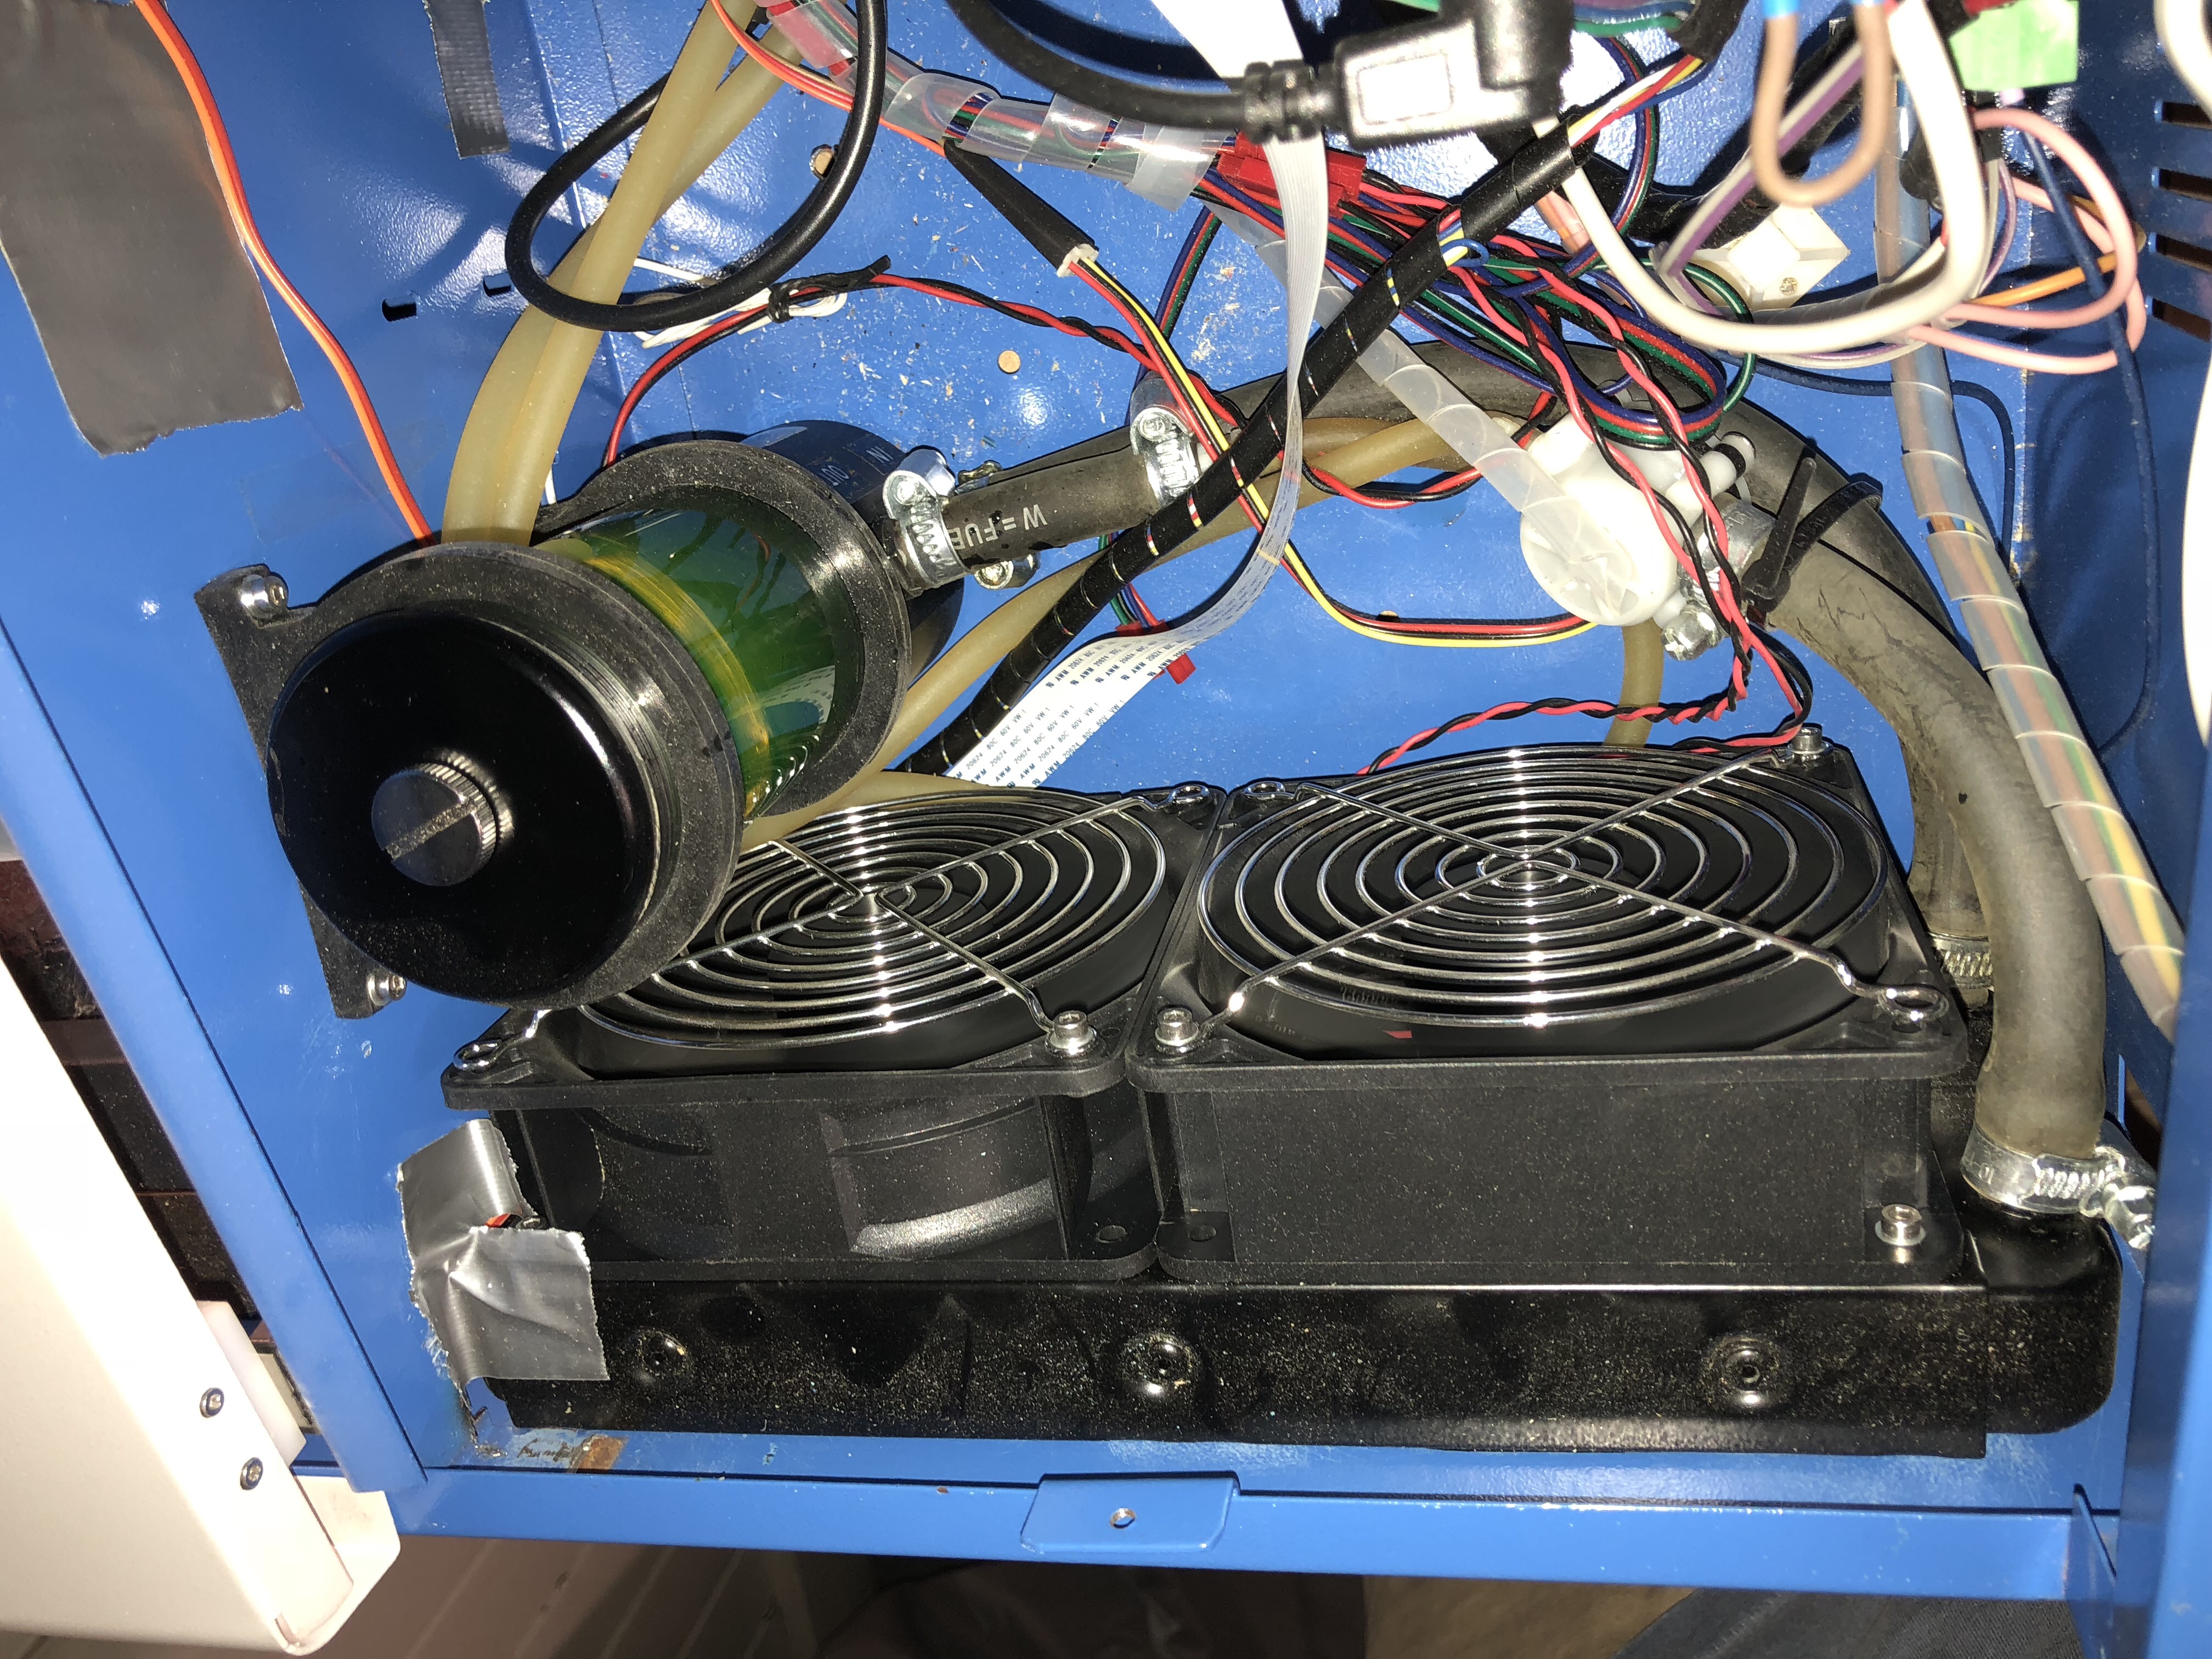
- Add PC water cooling system
- Add work area lid, flow and temperature monitor
I carried out all these upgrades over the course of a year or so, and my only regret is, that I did not do it sooner.
Based on my personal preferences and experience, I rang the air-assist and Arduino/Ramps upgrade highest, followed by work piece holder and heat exchanger. The rest is all good to have, but not as pressing.
You find plenty of videos and websites explaining the various options. Amazon and eBay are your friends.
A few observations:
- A PC water cooler (2x 12mm heat exchanger plus high-volume dual fans, integrated reservoir and pump) keeps my system at 32 deg C during continuous use over several hours. System sits in my Garage, so ambient temperature is between 15-25 deg C.
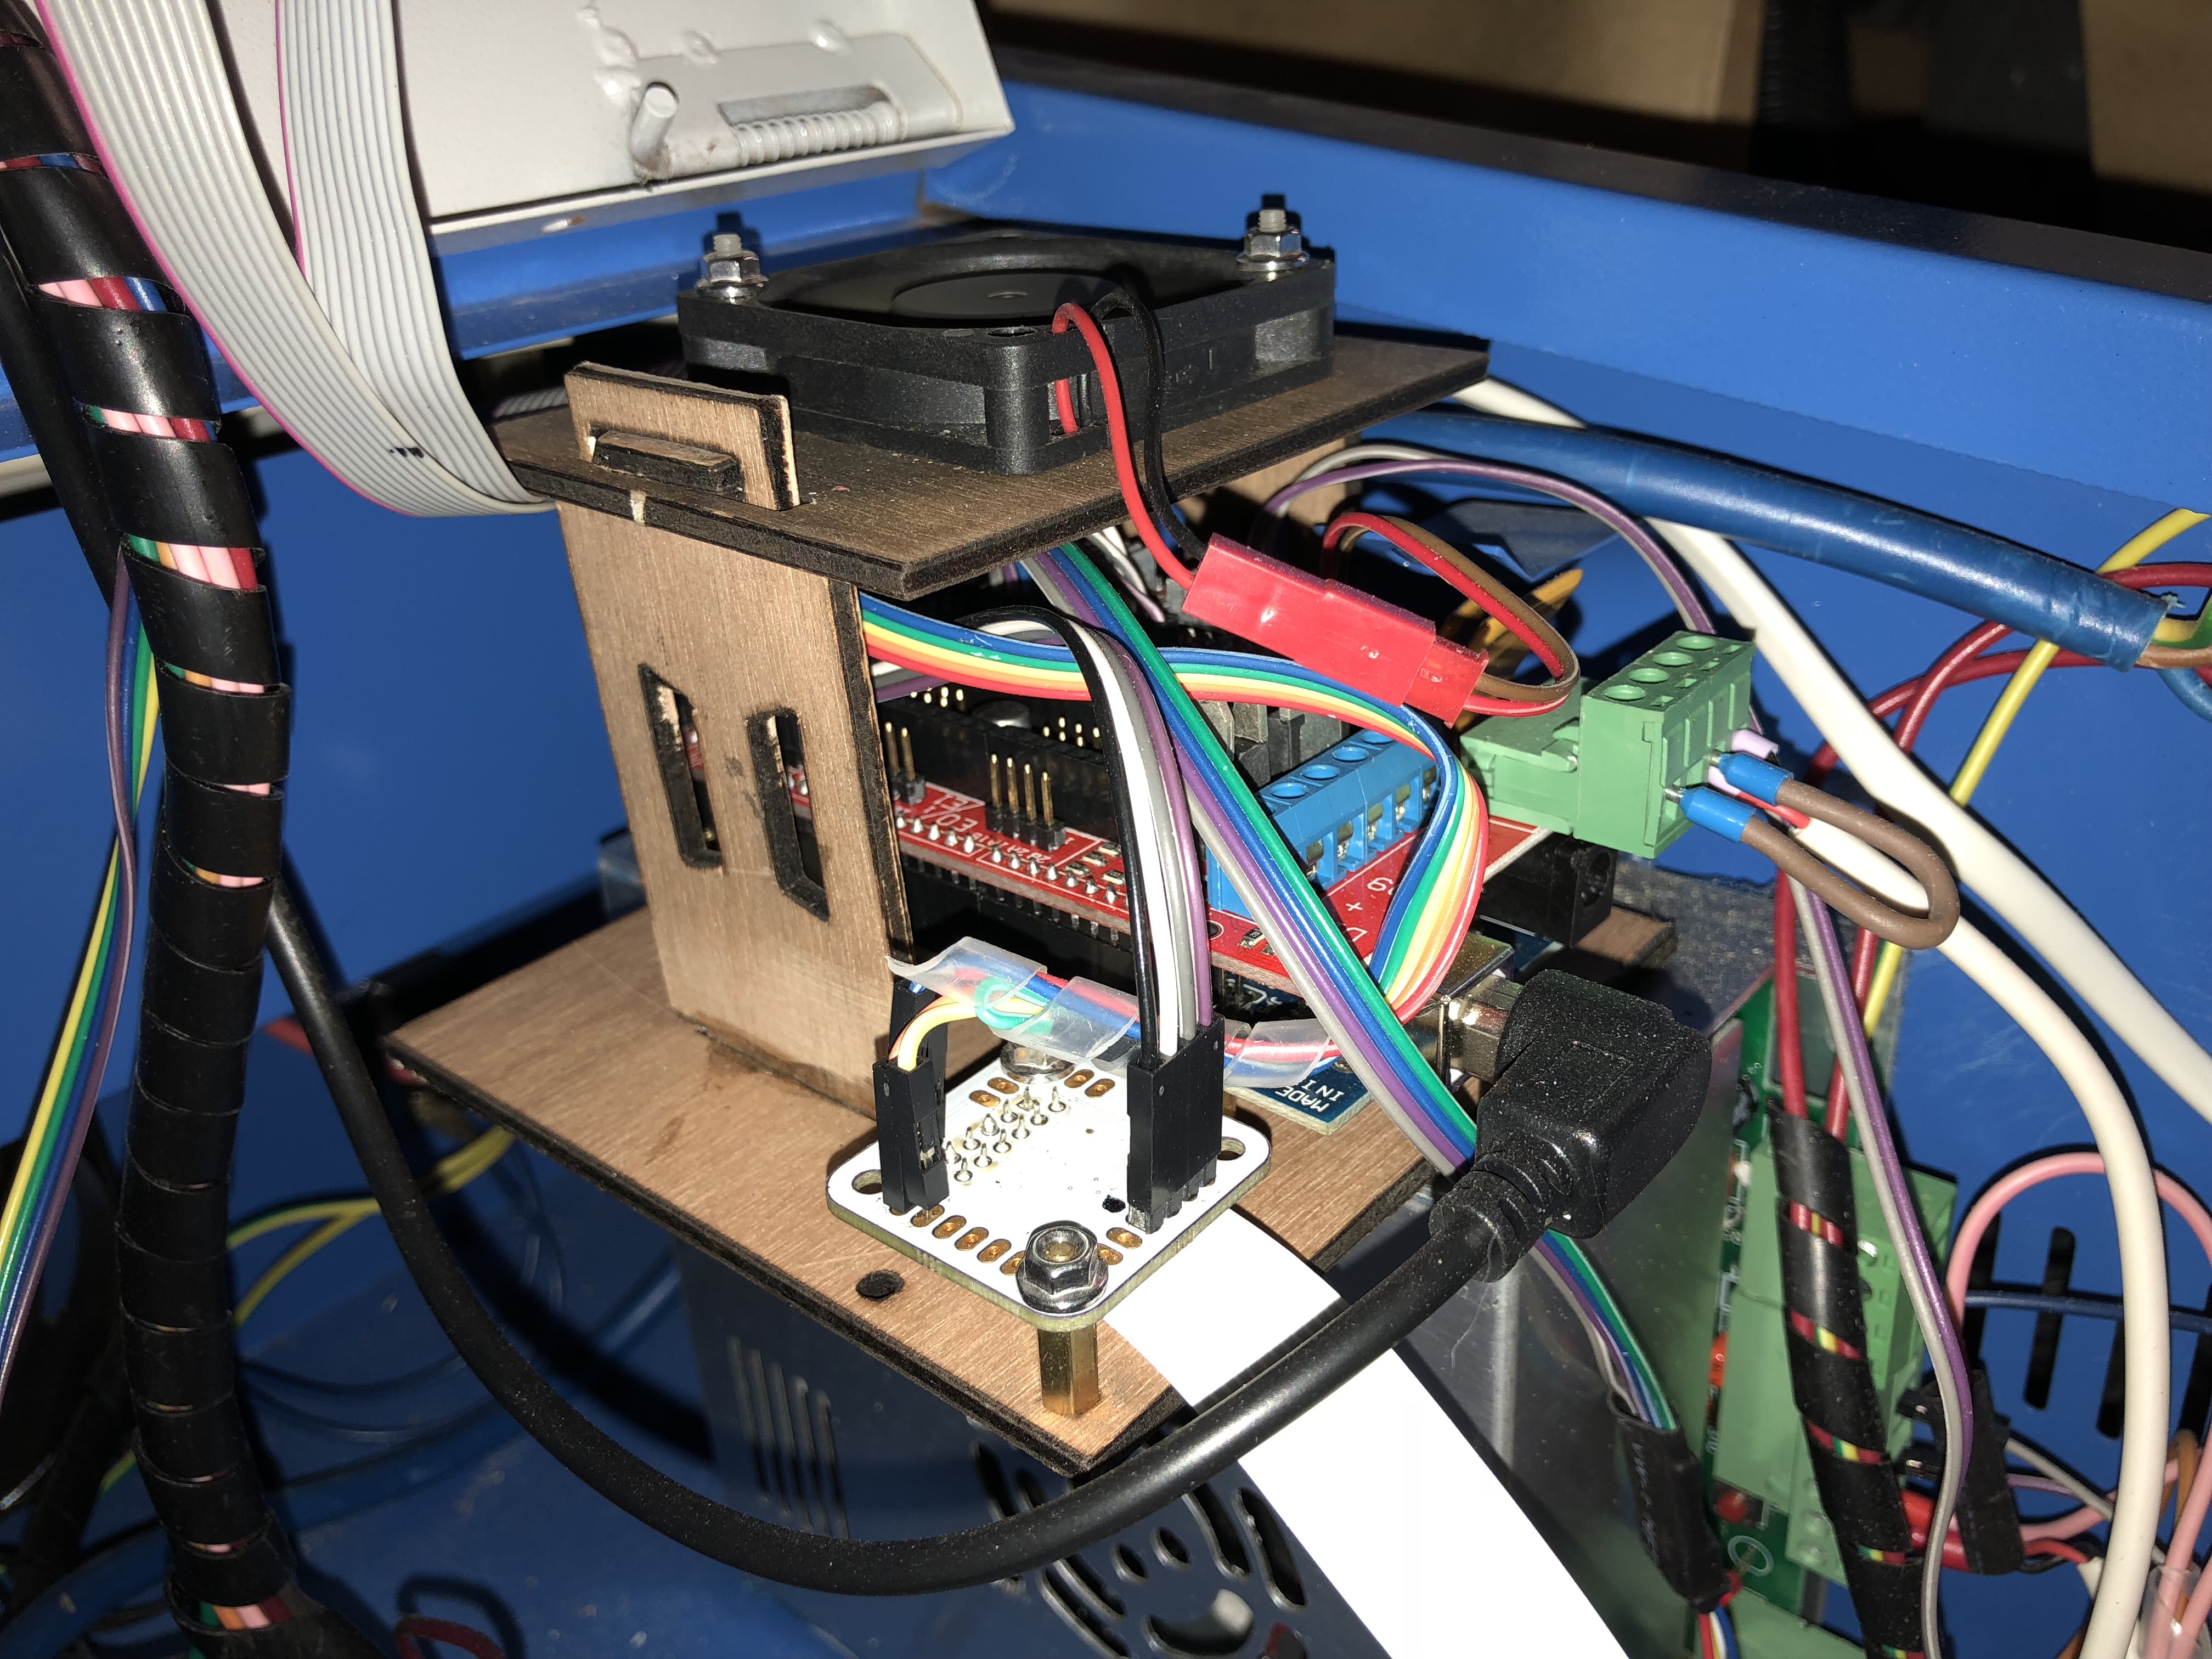
- The “K40 Middle Man Board” (from OSHpark or look for my ebay item) made the Arduino/Ramps conversion much simpler. (OCybress posted the design. I ordered a few spares and started selling them on eBay for a donation to save the children to shorten the wait and included the connector)
- I use 100% anti-freeze, since I do not always heat my garage during winter
- I am paranoid about fires, so I also bought a CO2 fire extinguisher and fire blanket
- The safety laser power-off gives me some peace of mind when I am tempted to open the lid. Since I installed the system, I no longer open the lid, because it ruins the cut. Problem solved. An Arduino board monitors a lid-switch, coolant temperature and flow. It has a small display and a buzzer alarm.
- I avoided cutting perspex when I started. Except for the smell, it is a much better material for laser cutters than plywood.
- The turnkey plugin for Inkscape is not the most intuitive, but works 100-times better than the Corel software plug-in that comes with the K40. I had a strange experience where my scaling factors no longer worked, and a few weeks later I had to change the scaling factors back again. Never figured out what had caused this (I am running Inkscape in X11/XQuartz on OSX).
I design in Fusion 360, export sketches as DXF, import into Inkscape, adjust layers and resolve objects into components, convert objects into paths, generate GCode and use Pronterface on an el-cheapo Win10 tablet (£150) to control the K40 (a Raspi could probably do that job just fine, but sometimes I want to use Inkscape in the workshop to make some minor adjustments)
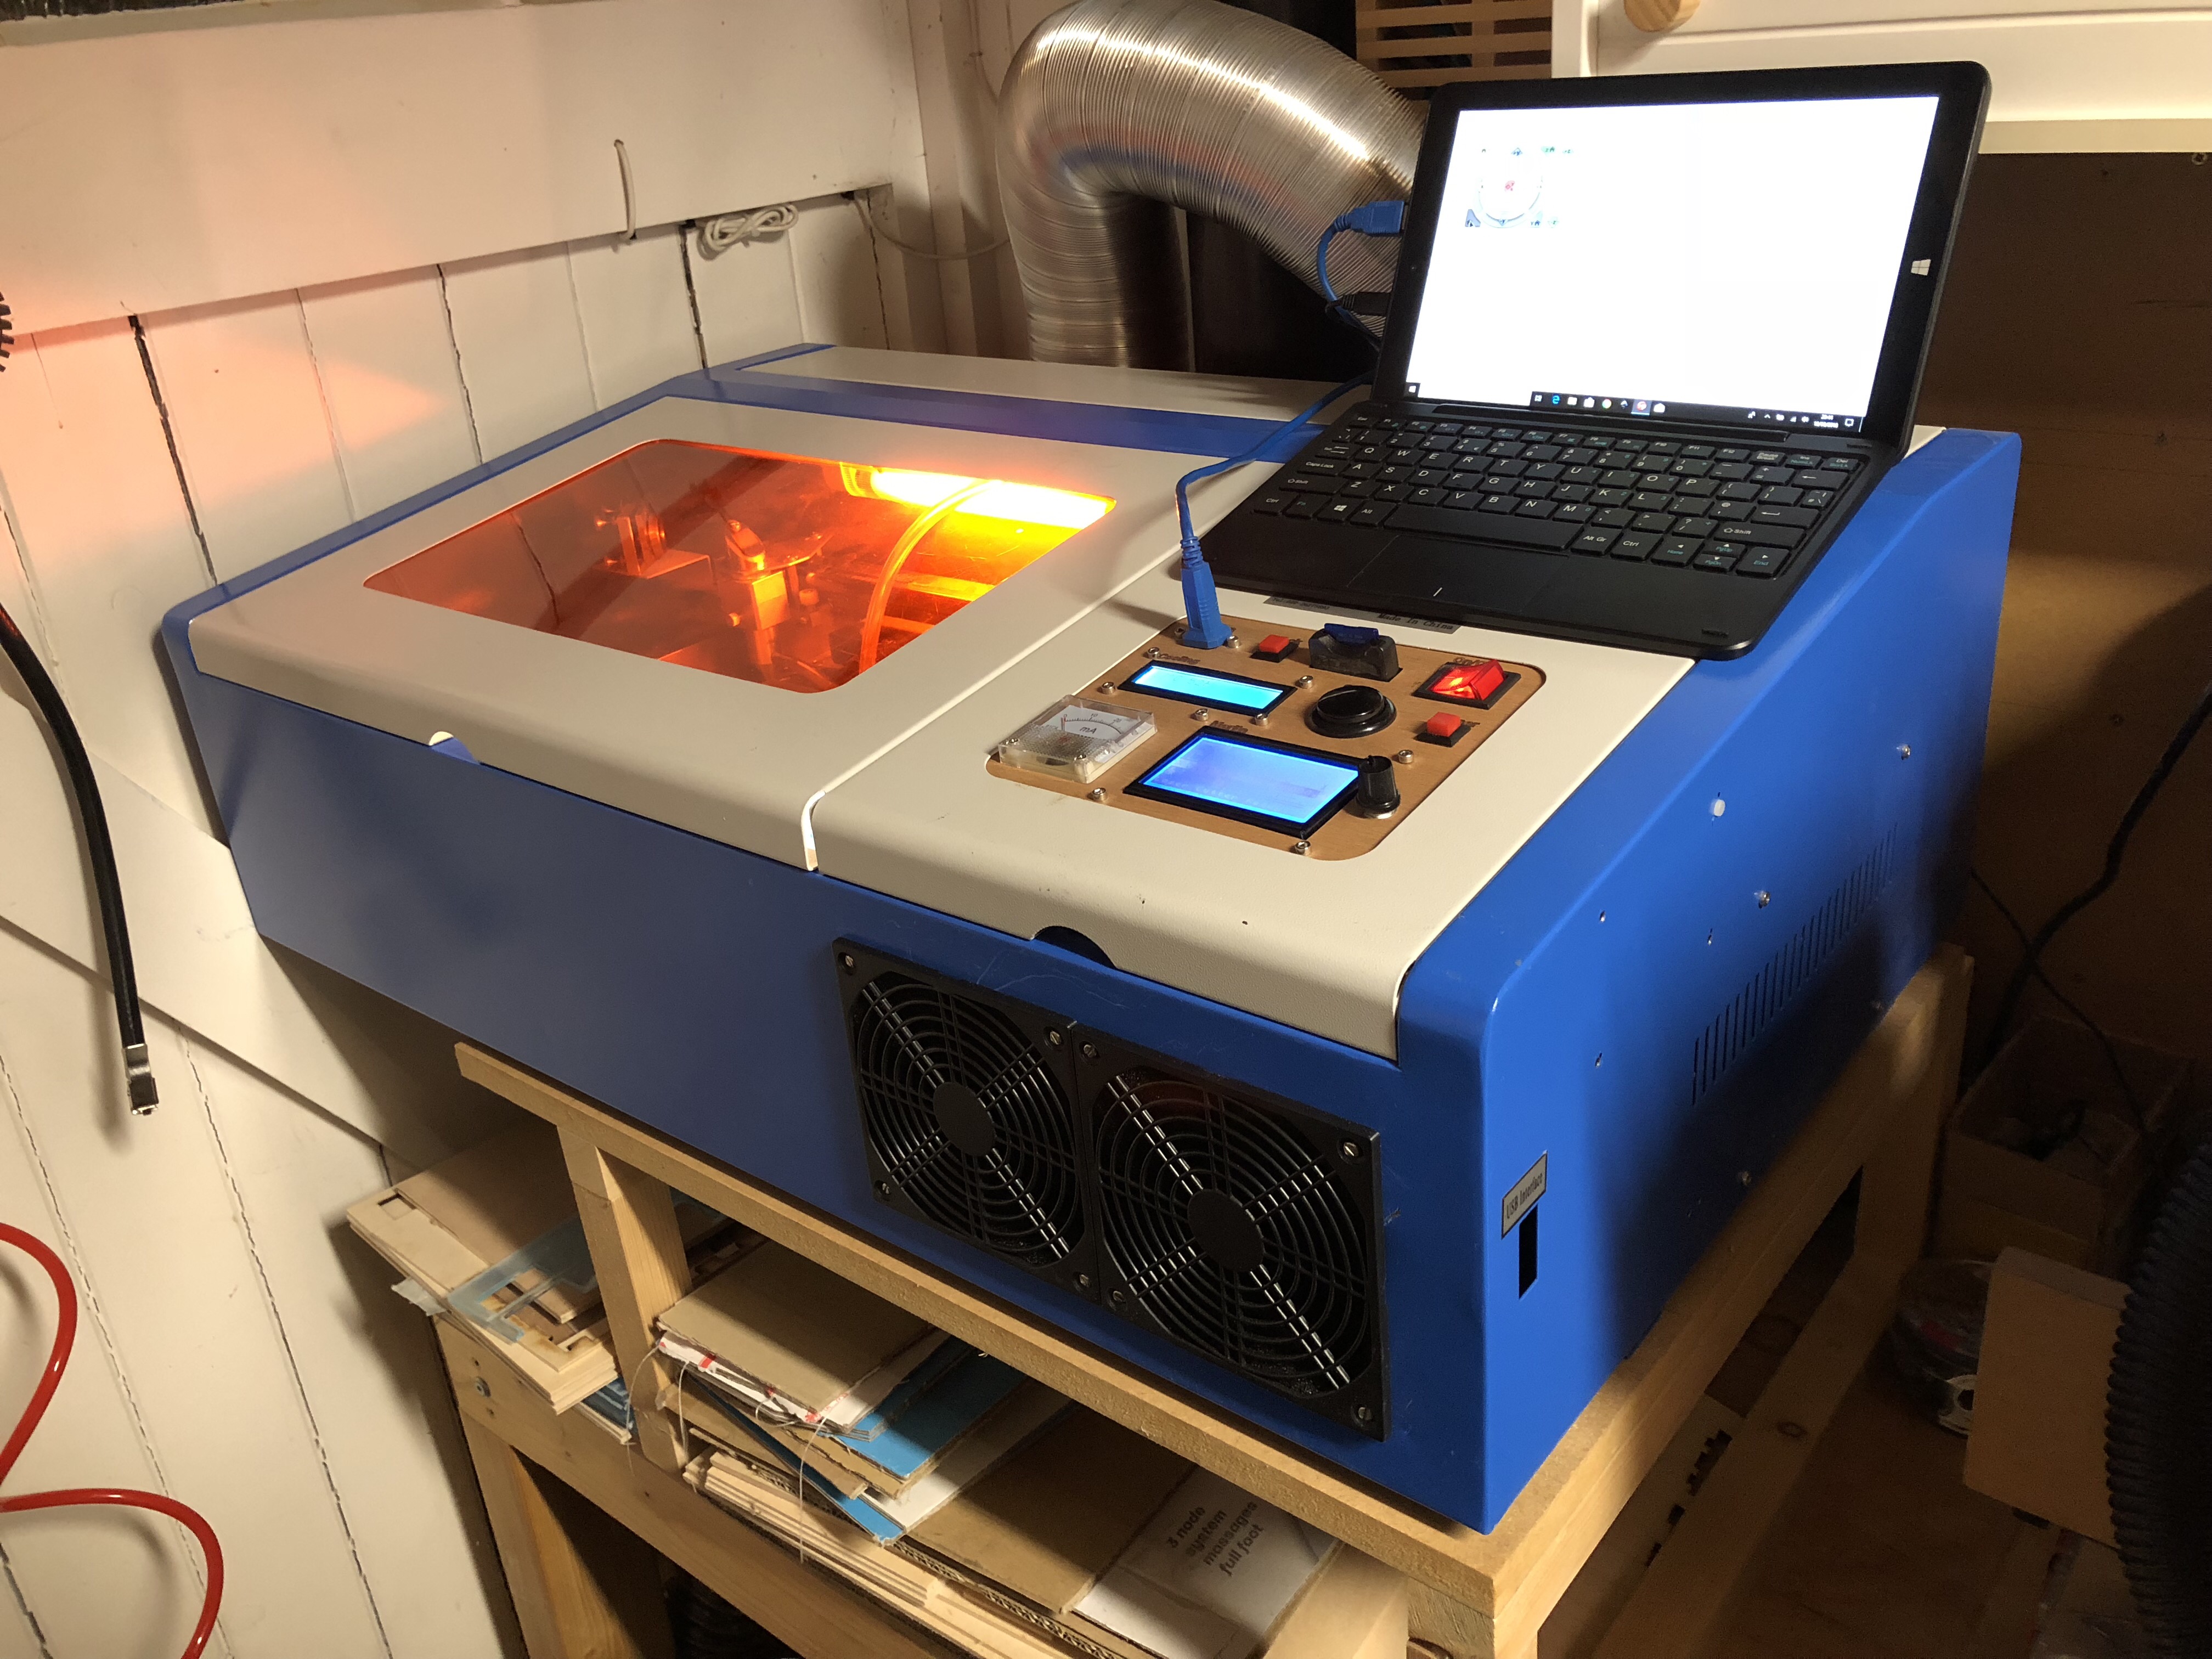
Below are some pictures. Feel free to contact me if you have any questions.
Control panel with monitor-display and the ramps display.
The “Ack” button resets a temp or flow alarm. Search long enough on AliExpress and you will find the exact buttons that the K40 comes with.
I use USB and SD reader extensions
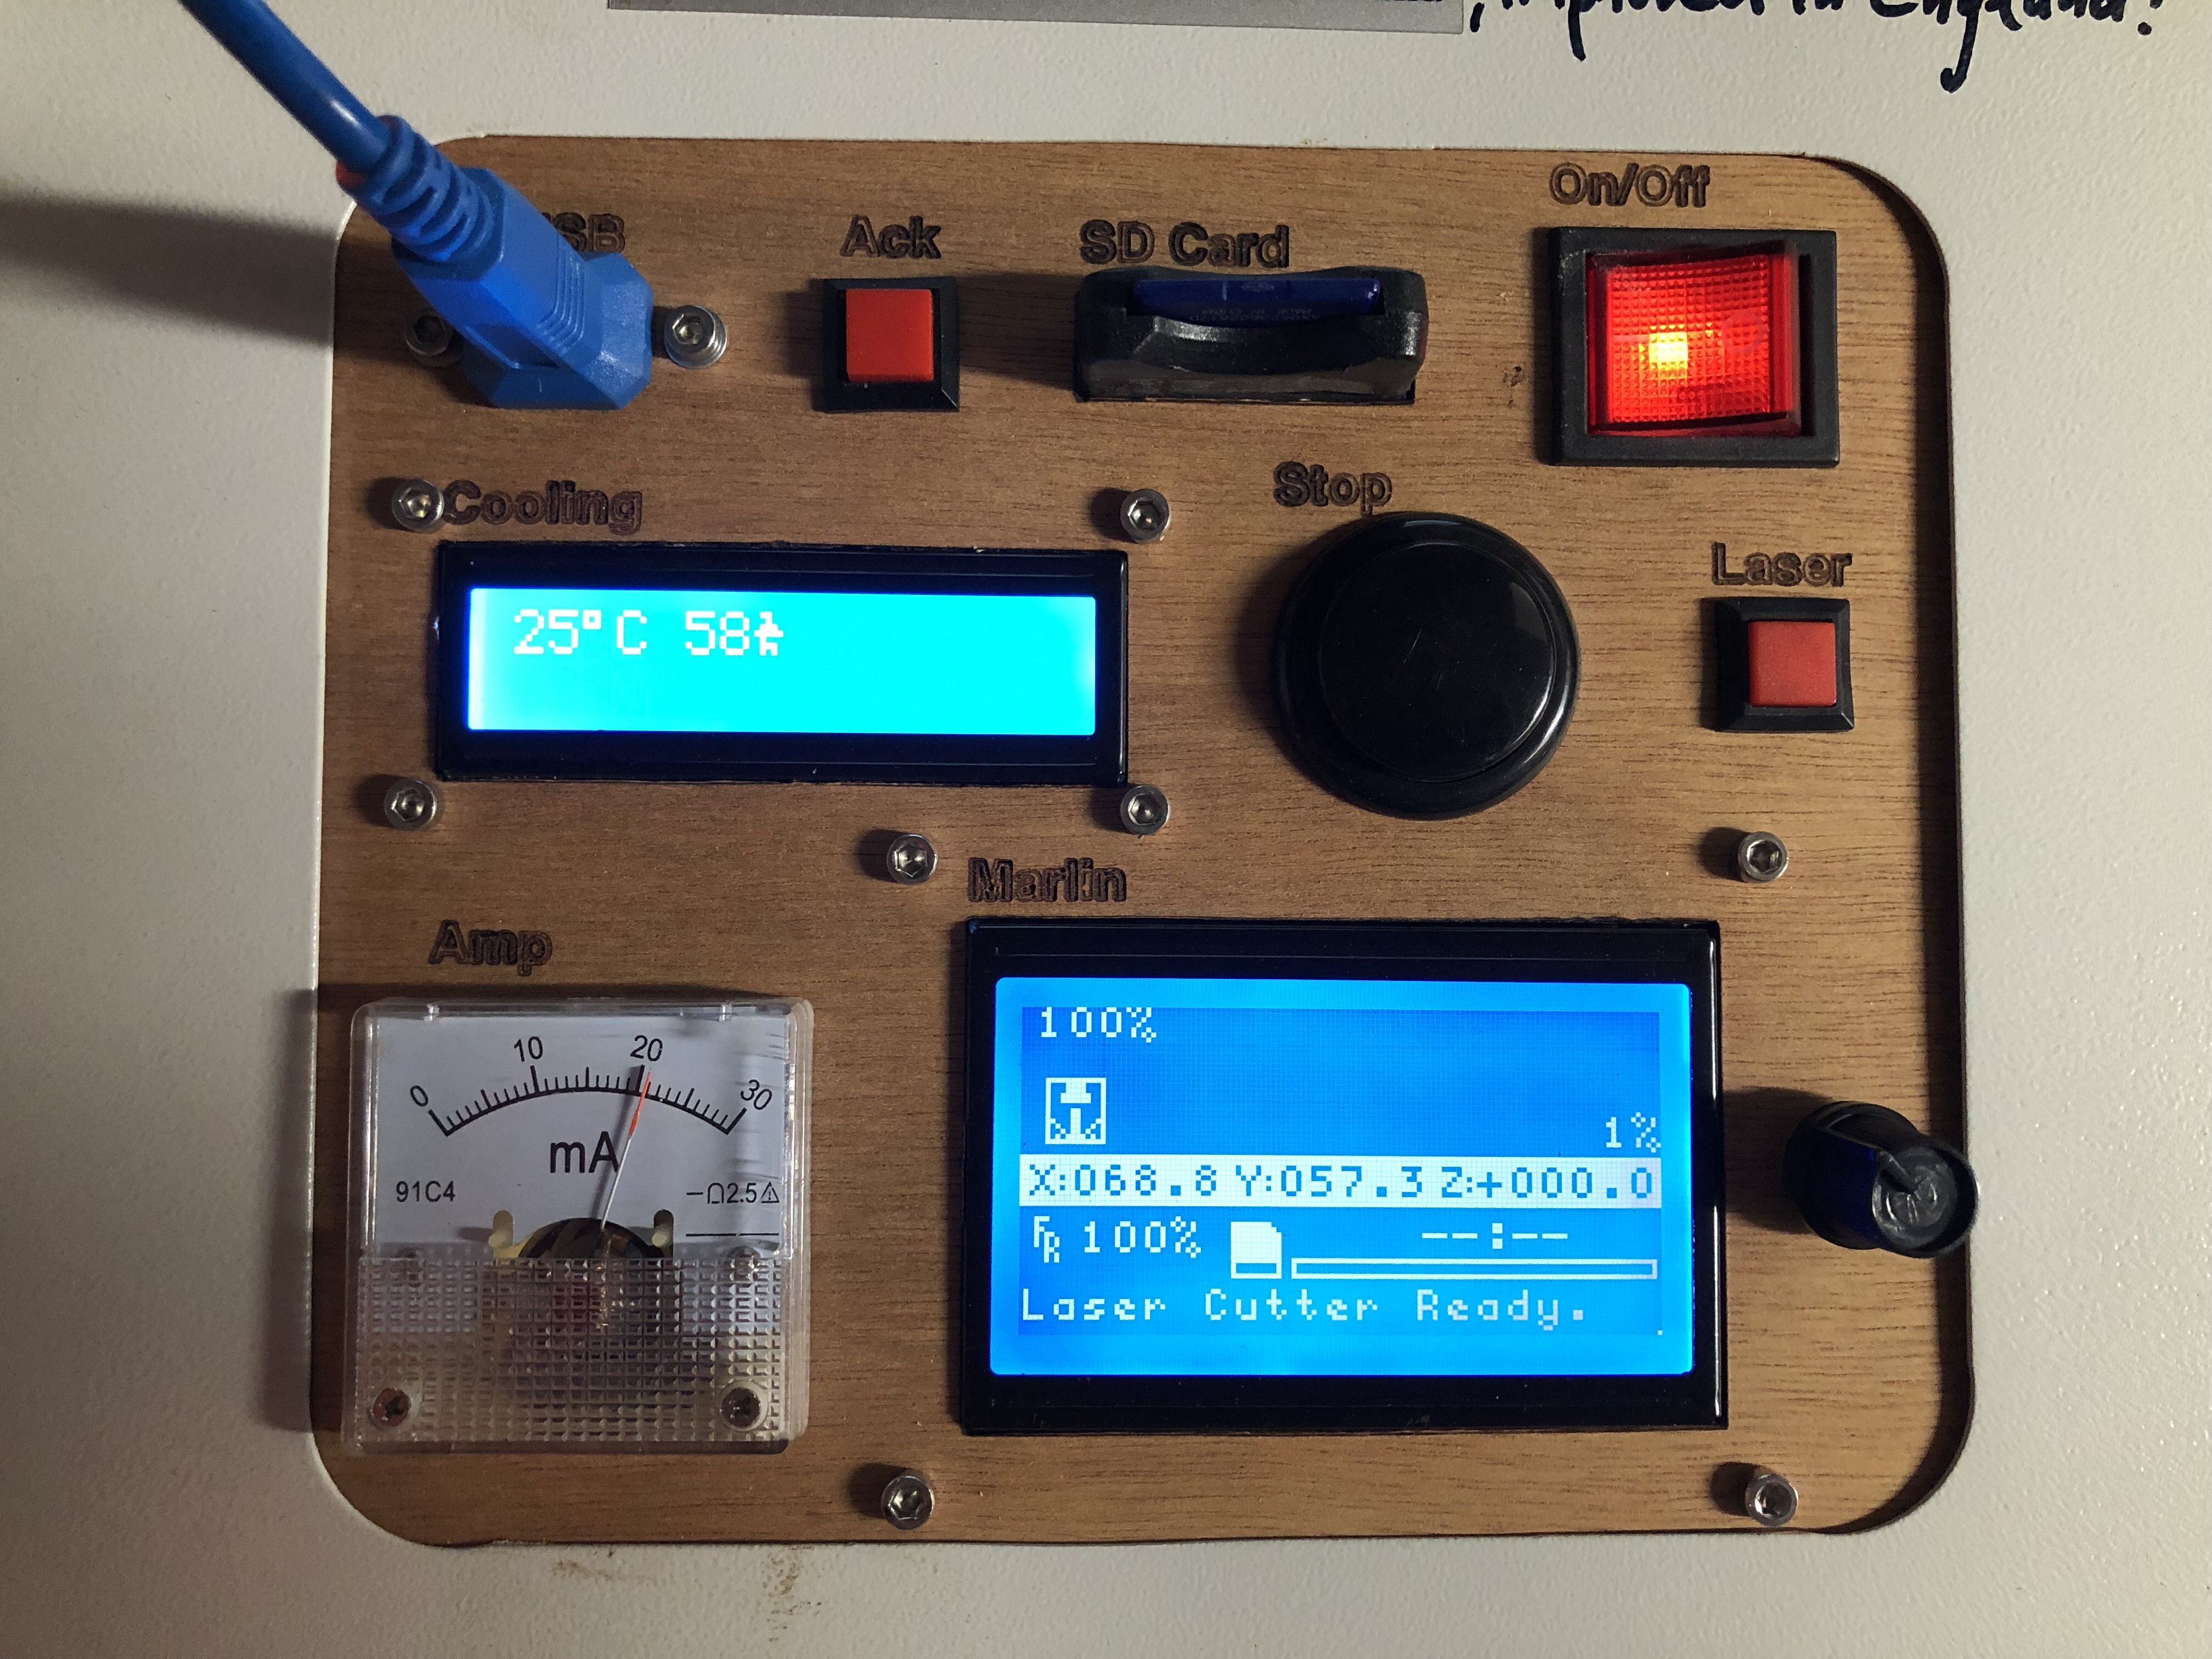
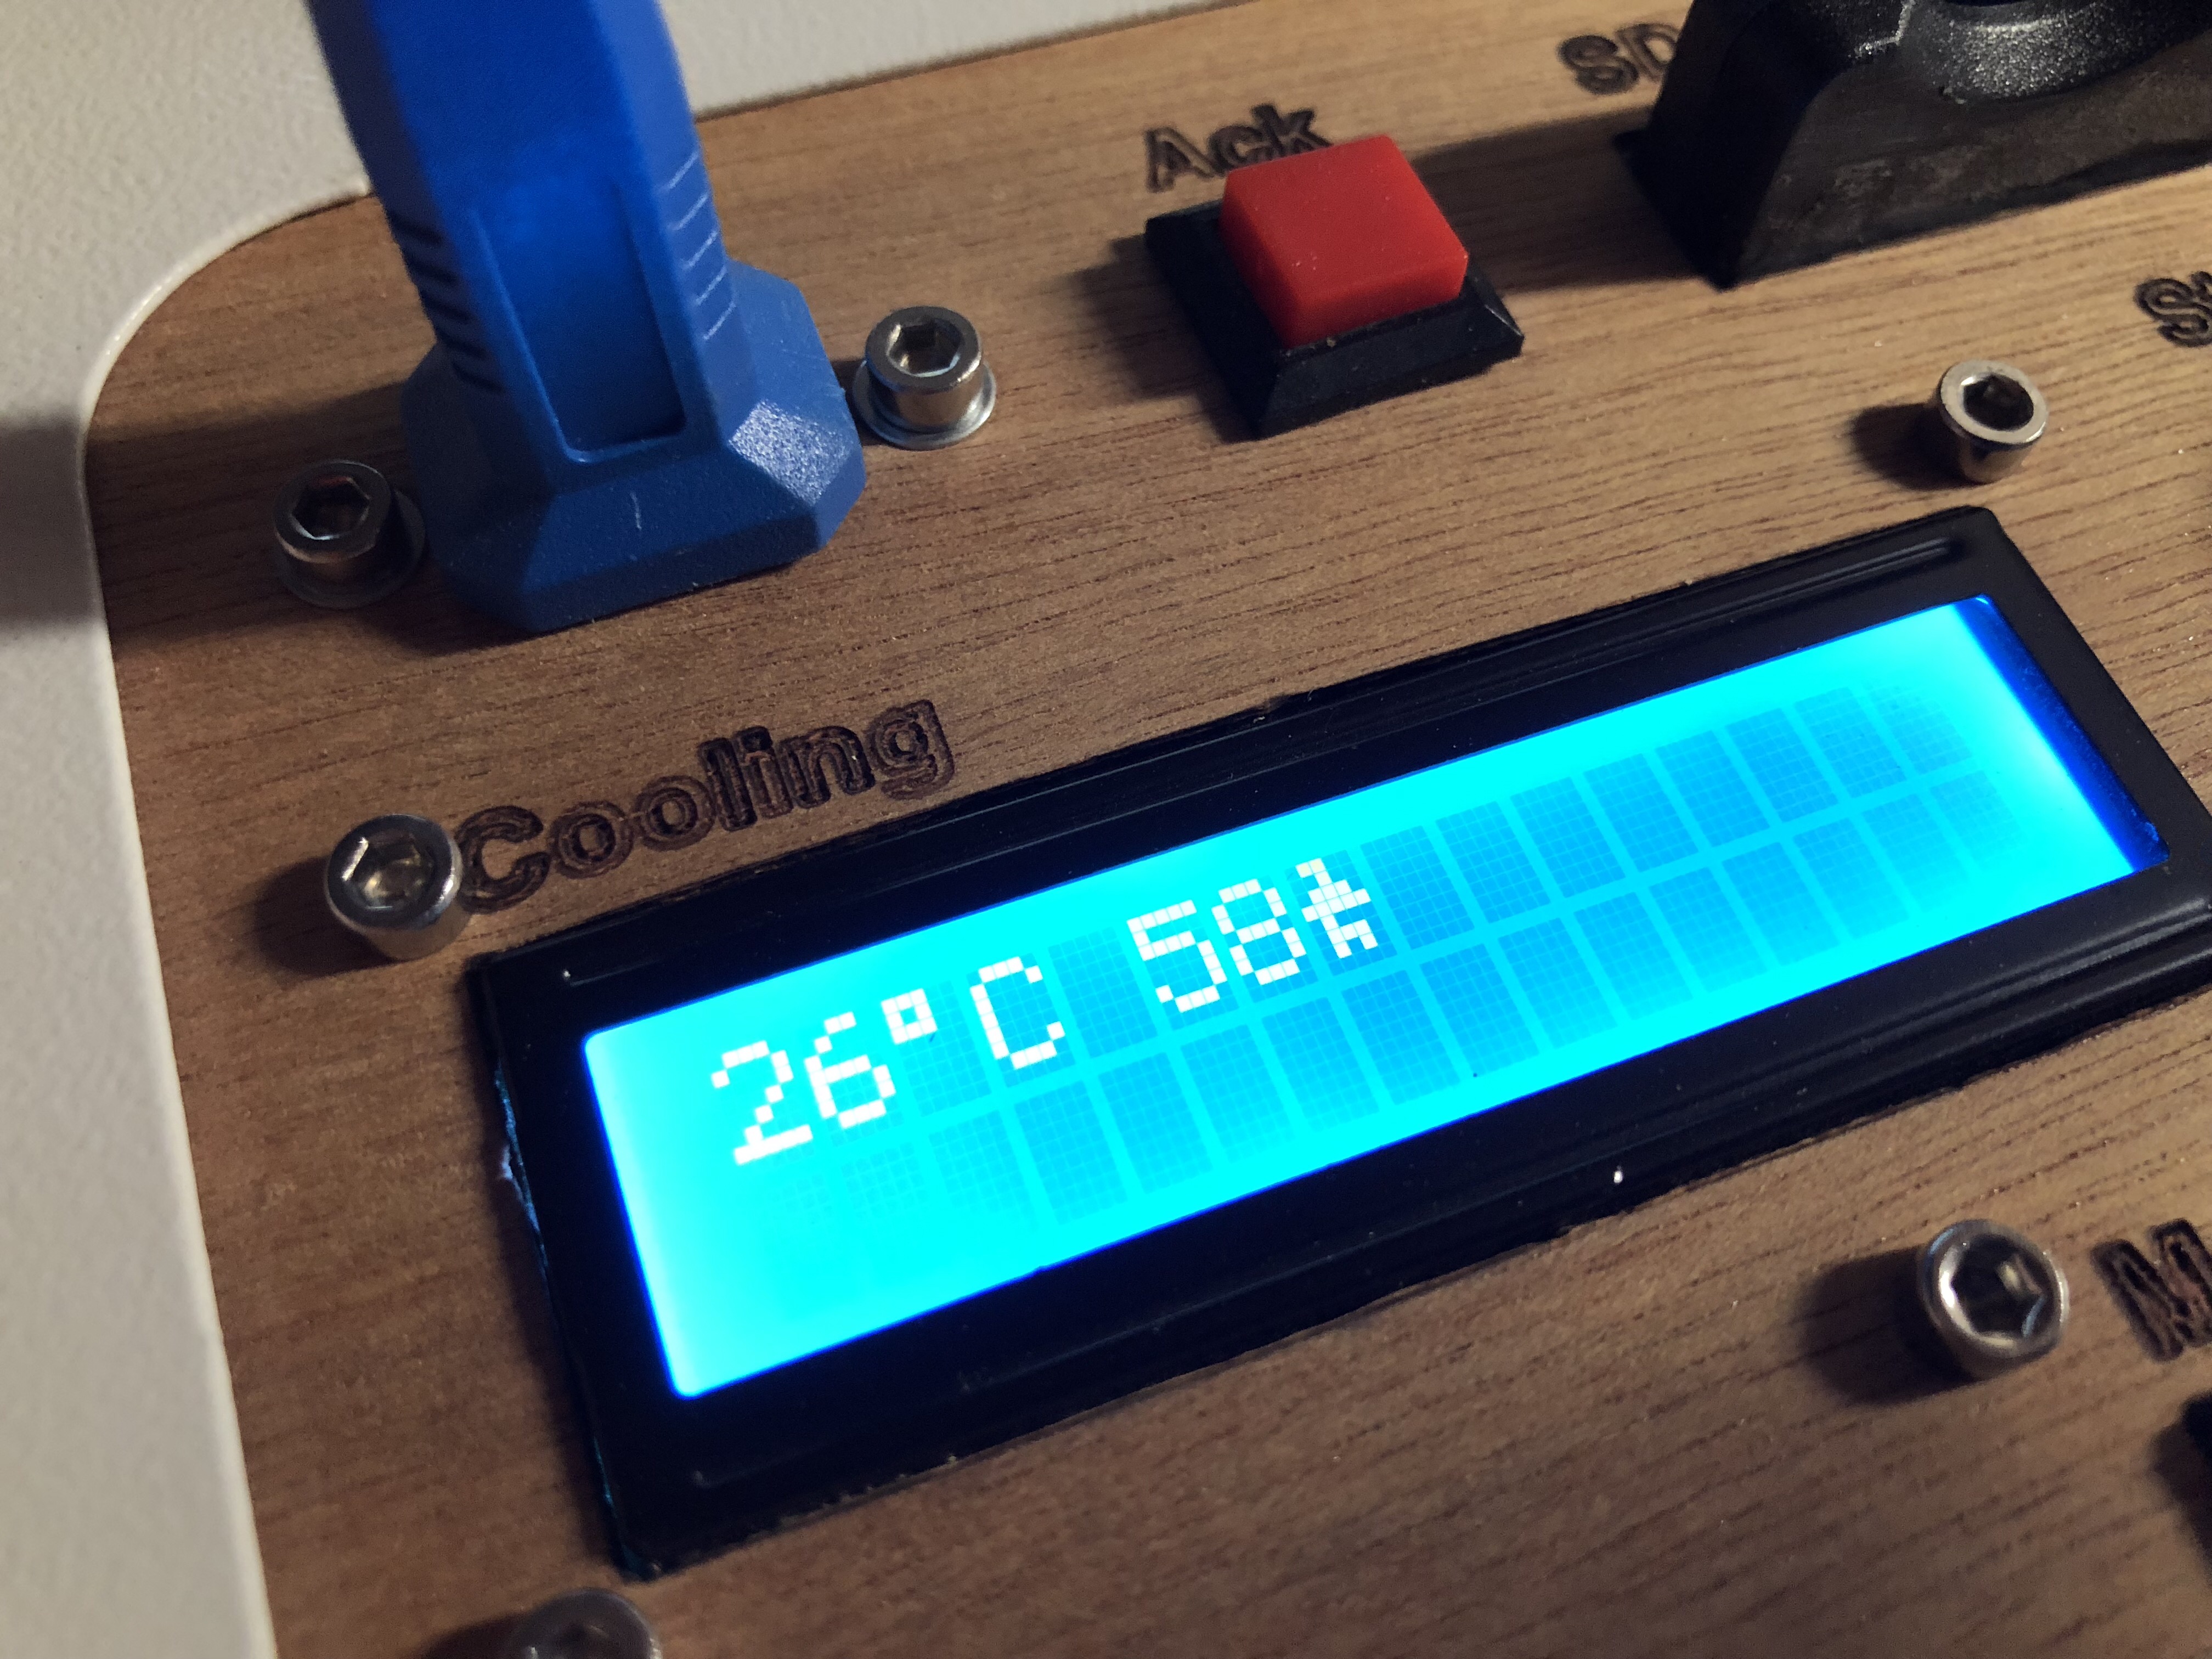
Coolant temperature and coolant flow :
work area light:
Cooling fans, heat exchanger and reservoir/pump. The green stuff is the antifreeze:
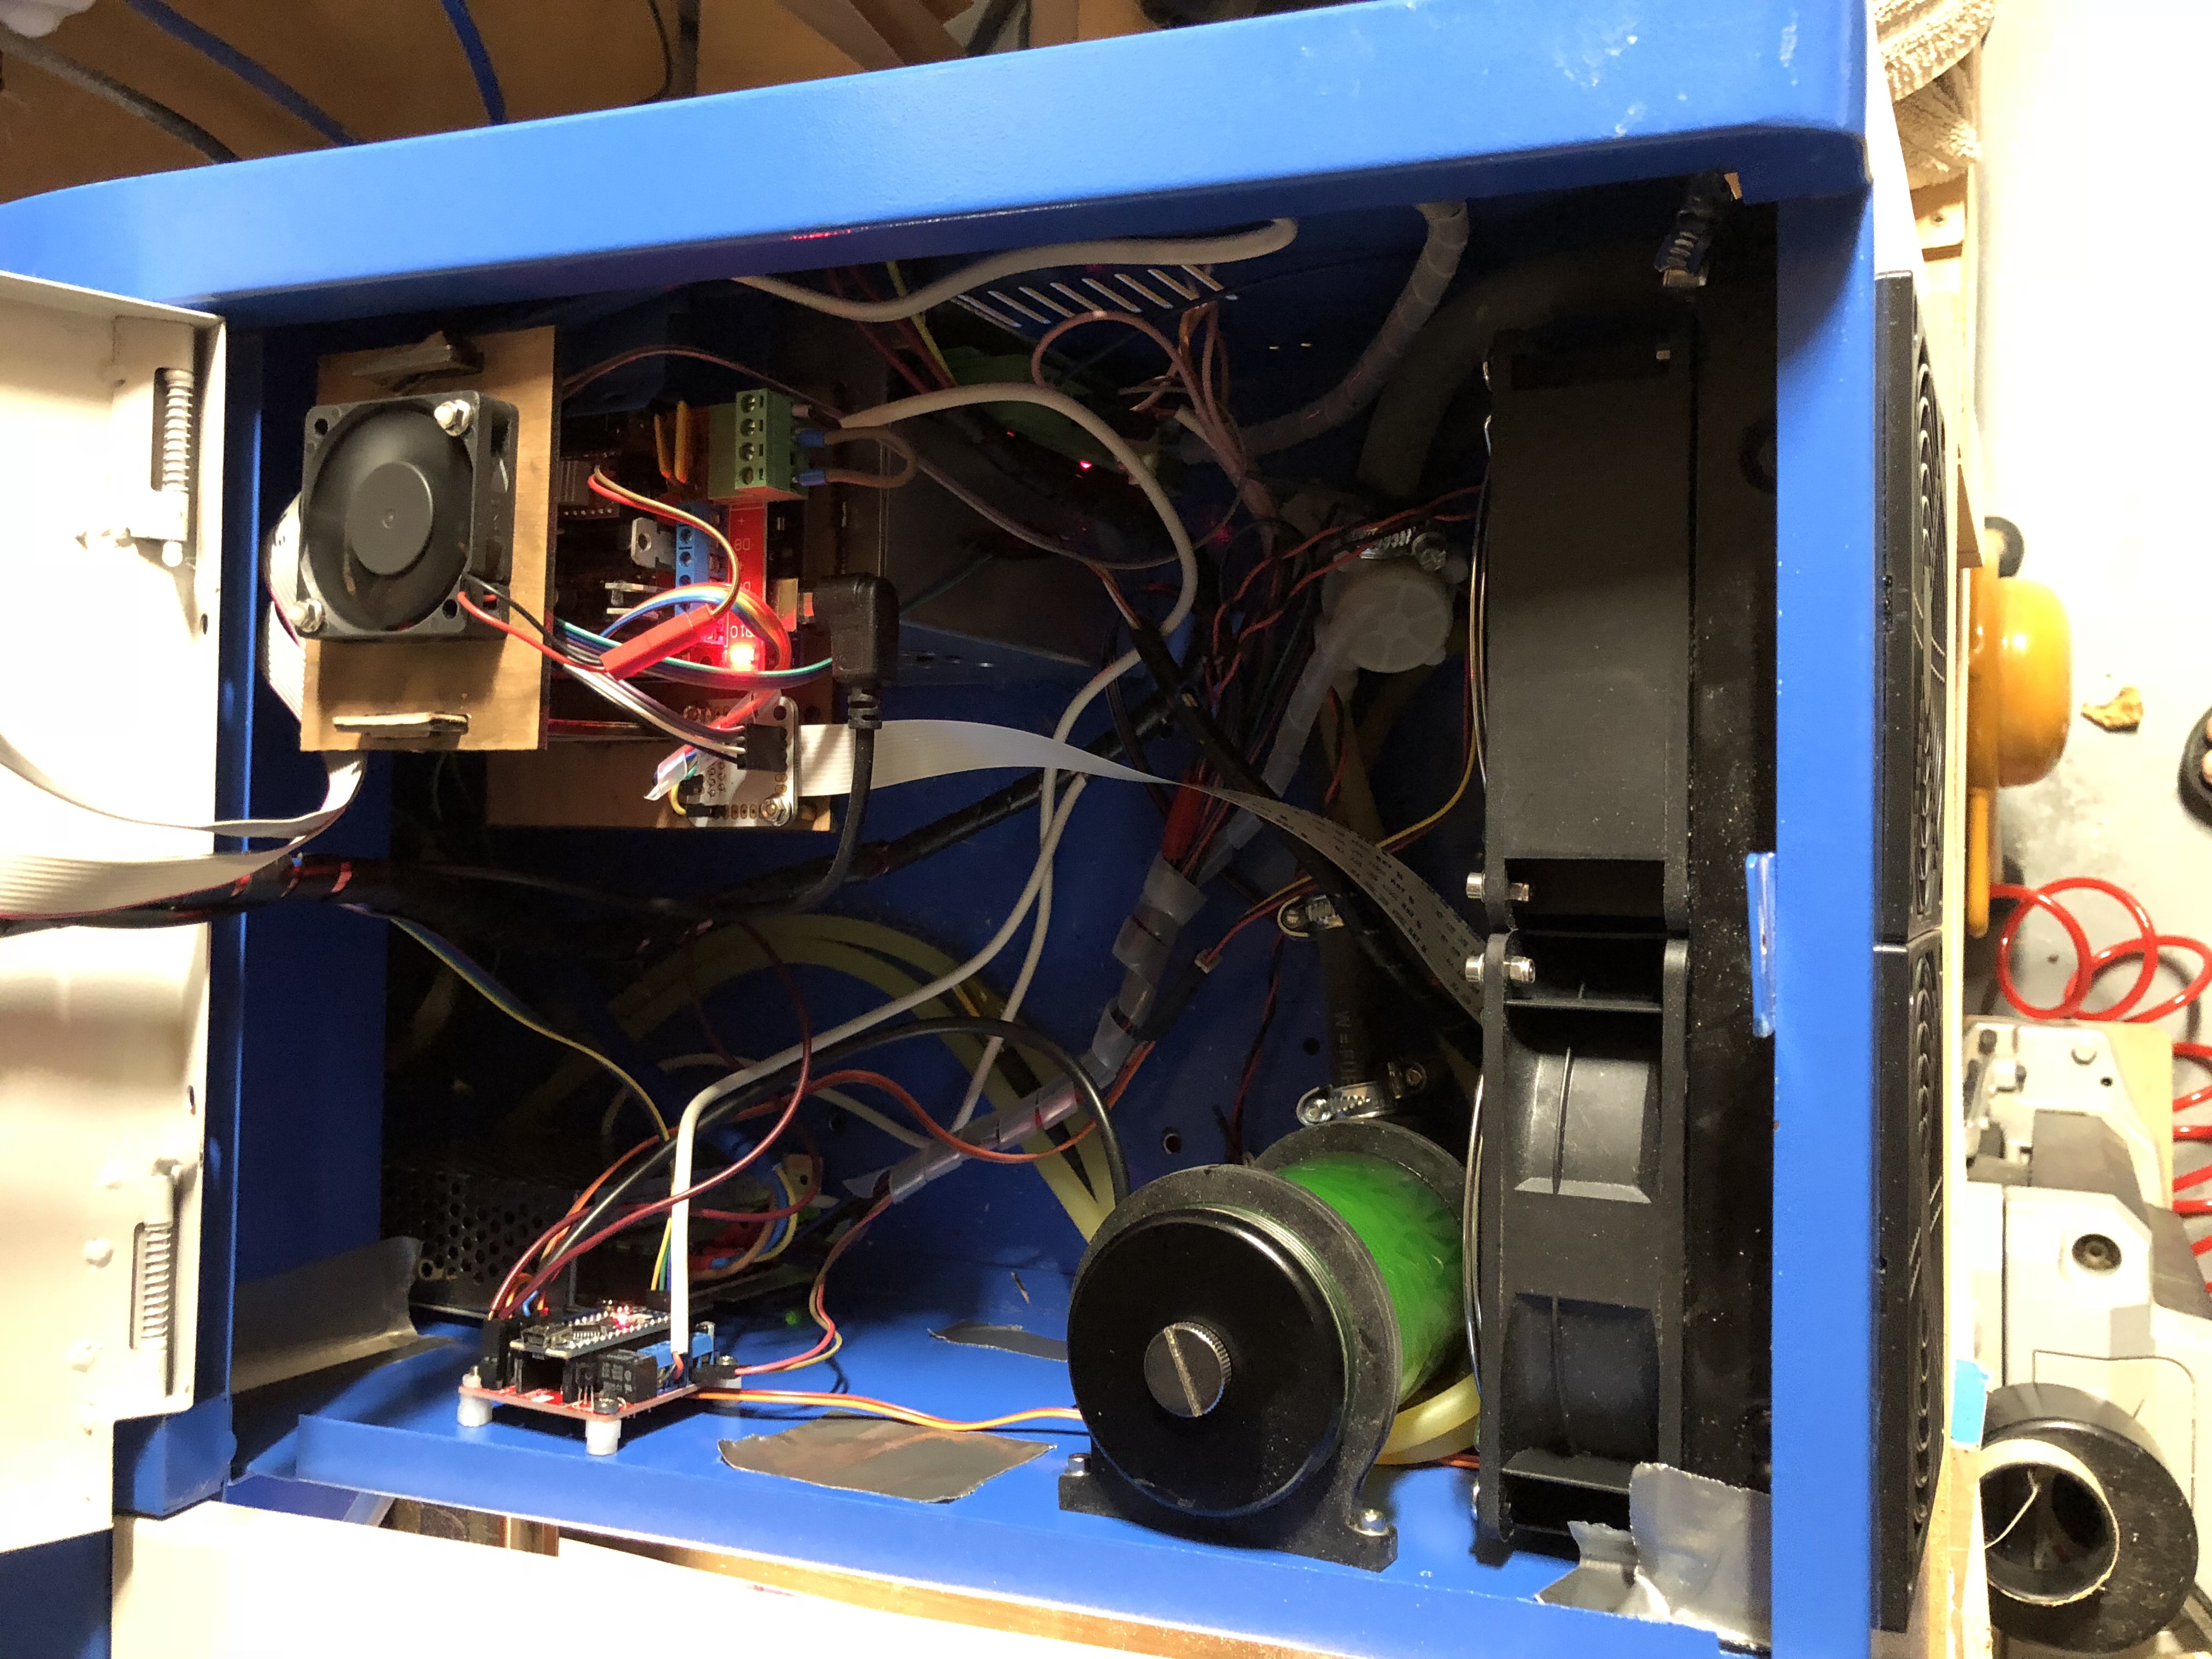
Once you rip out the old board, the right cabinet offers plenty of space. It can possibly also fit the air compressor, but I wanted to keep the vibrations away, so I installed it under the table the printer sits on:
Middle Man Board in action:
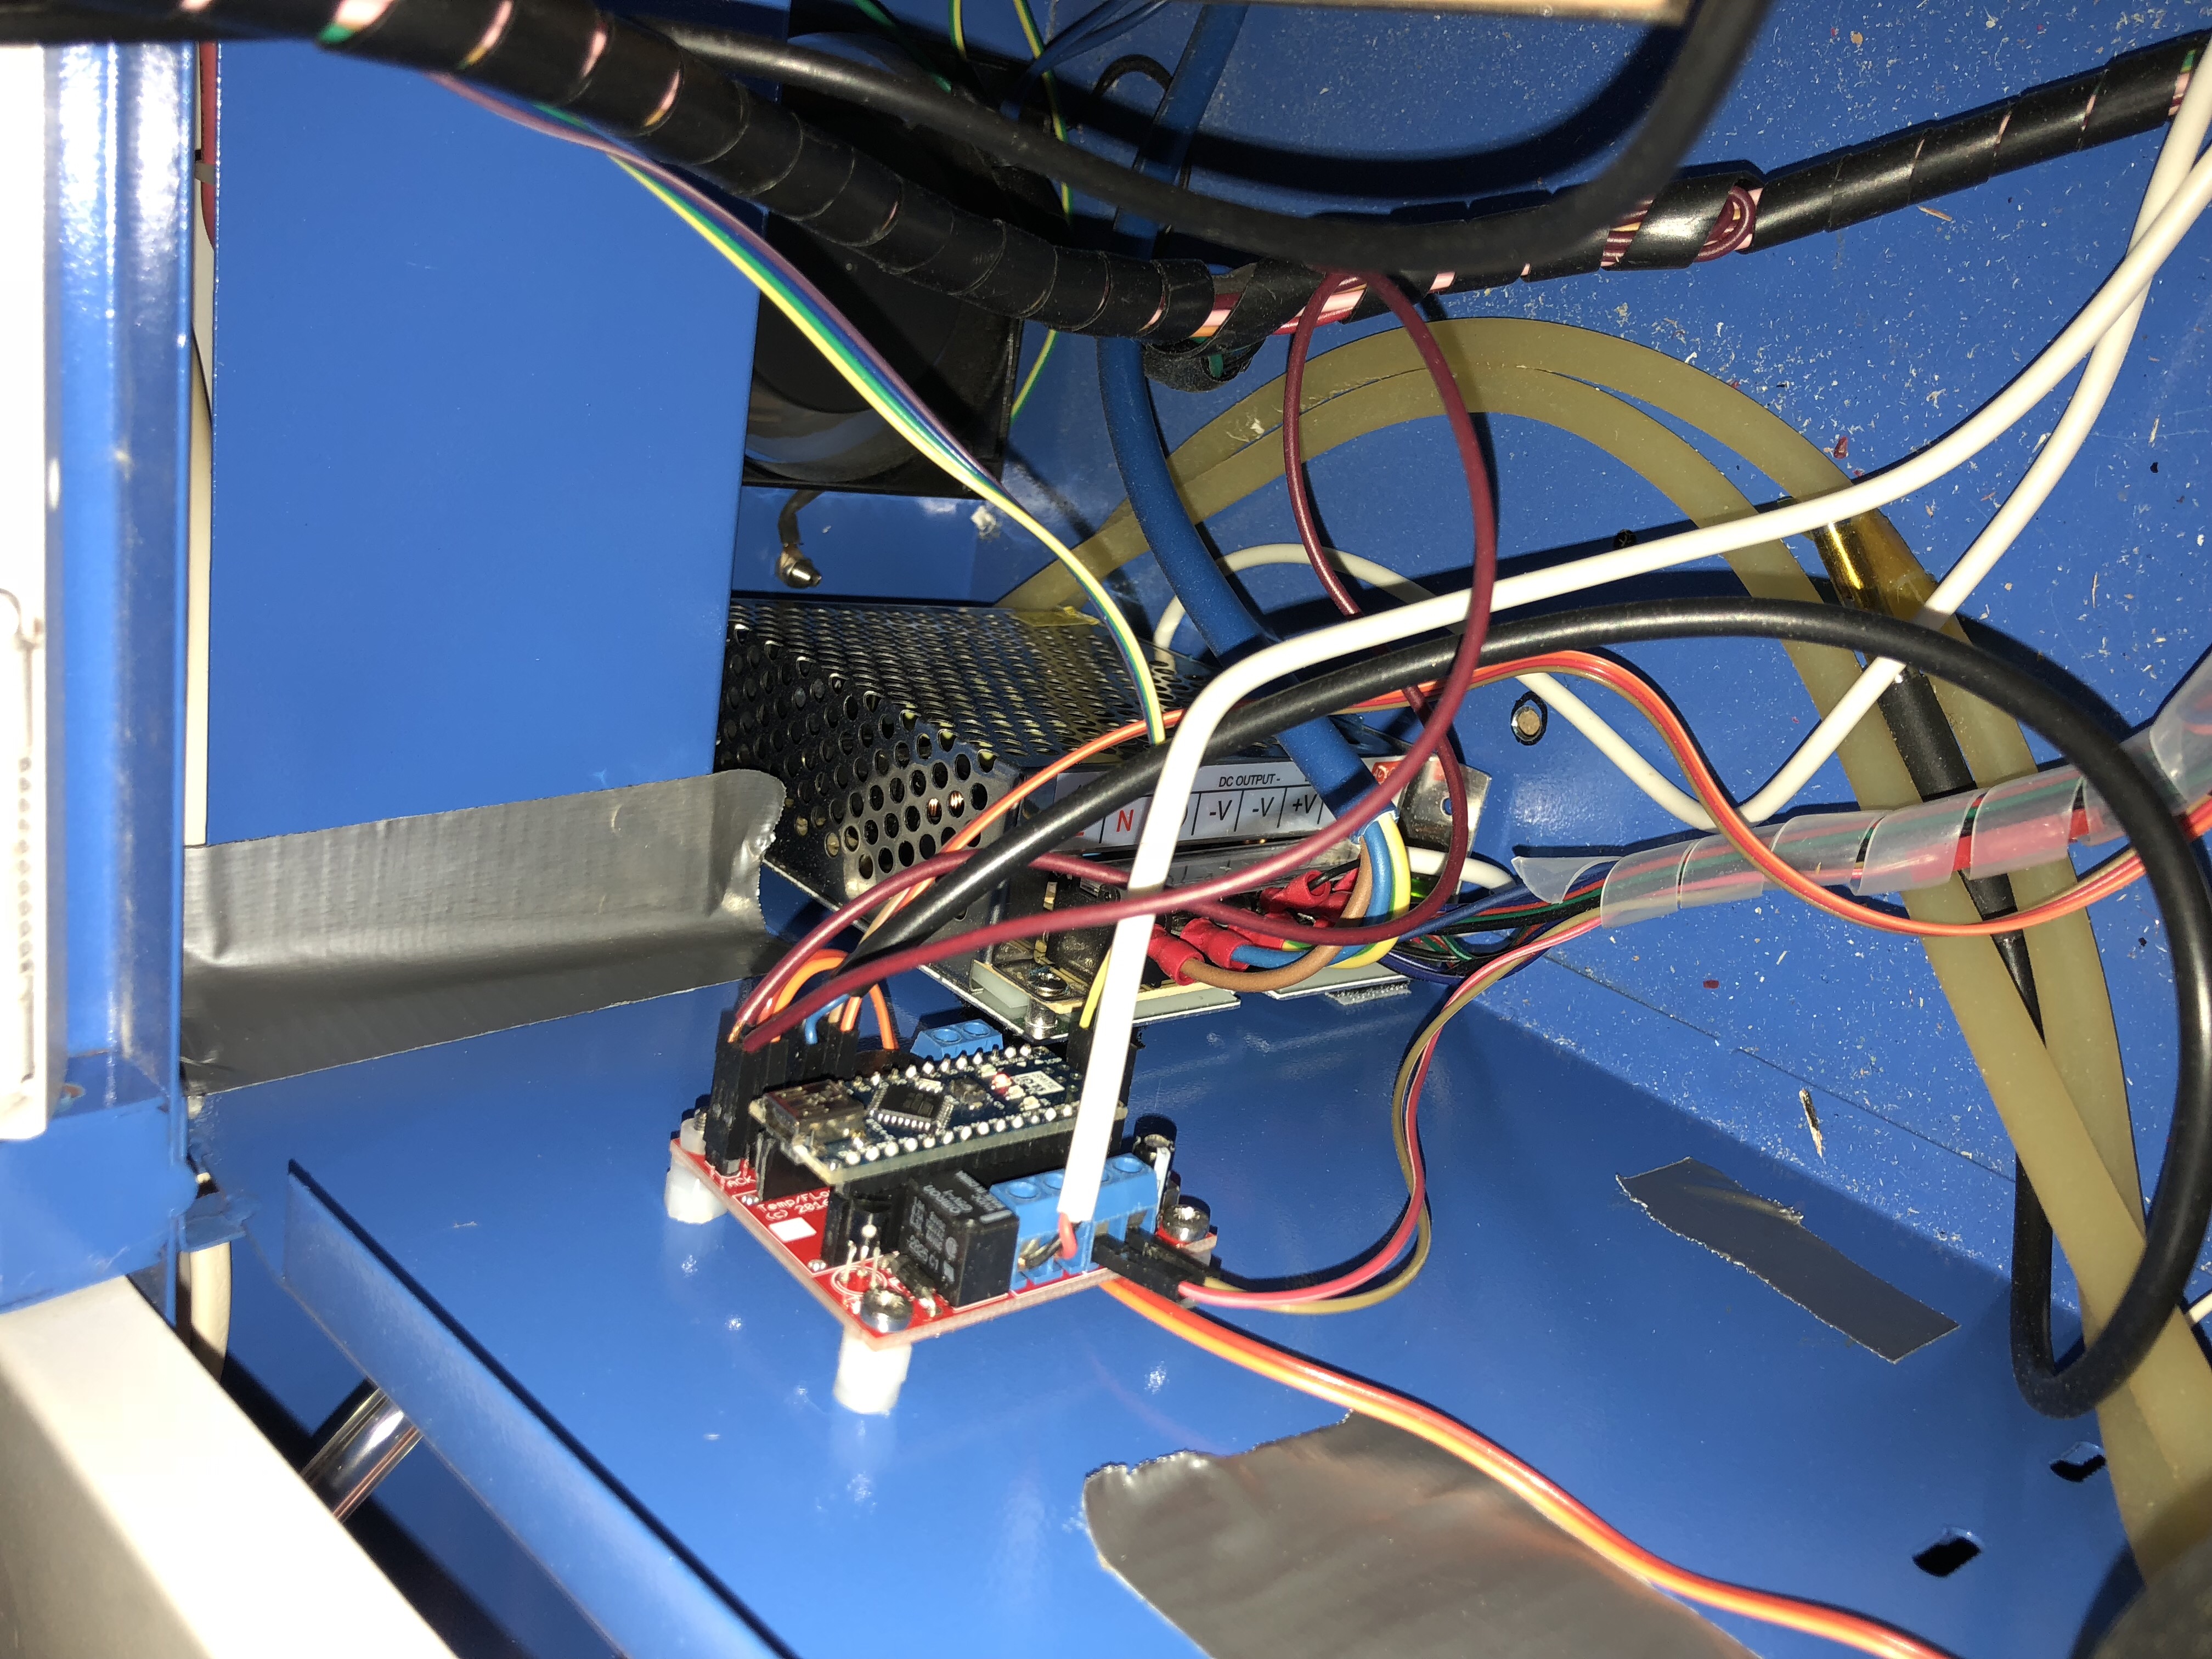
This is the control board for the lid-power-off, flow and temperature monitor:
This is the switch that watches over the lid/cover: